
Last Updated on June 4, 2025 by PorchLightReading
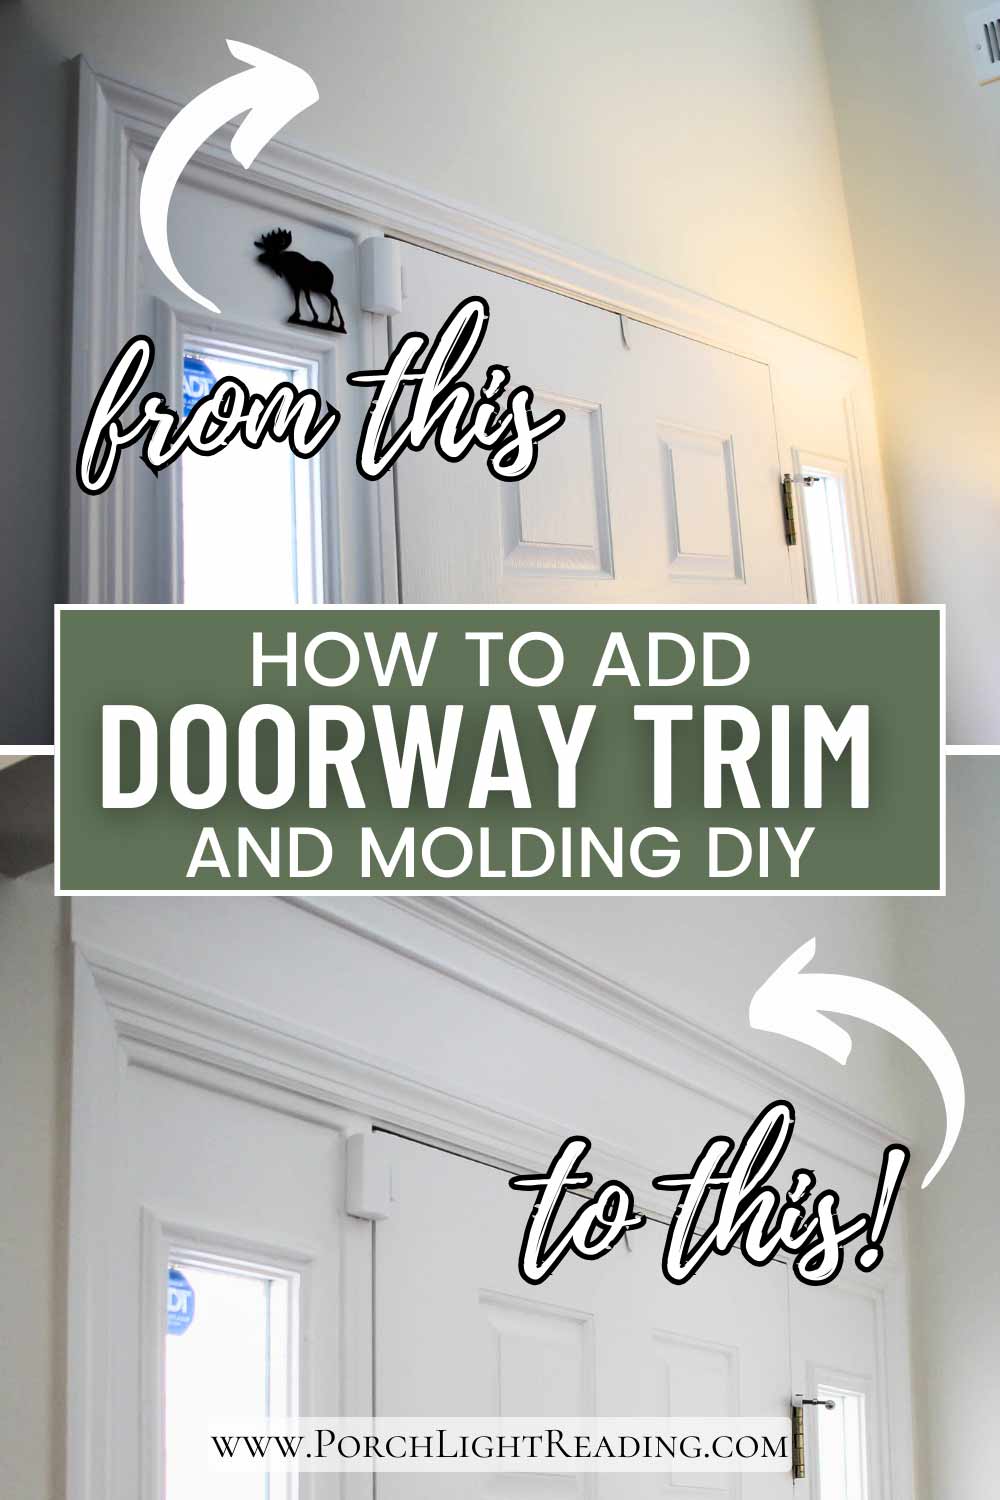
How to install door molding, beginner friendly DIY guide. Including step by step photo directions, materials list, tools, and other helpful tips for trim and molding installation.

Our front entryway is incredibly tall. The second floor overlooks the front entry below and was a highlight for our kids when we first moved in just a year ago. Balloons, squishmallows, laundry, anything they could throw over the balcony to make a fun game, they did.
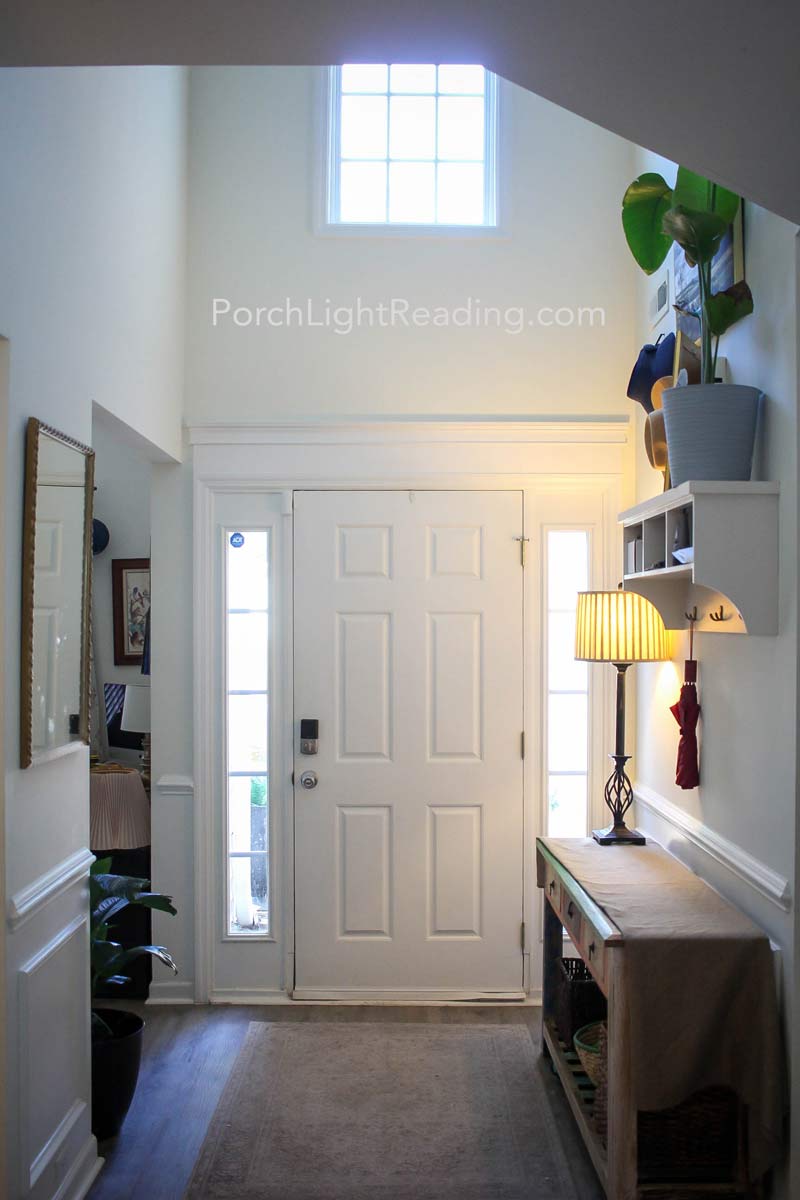
The front entry was grand and beautiful but there was something missing. The doorframe and surrounding windows were lacking in substance and elegance. It was missing height and decorative framing. An easy fix if you know where to start.
Follow us on…

This post may contain affiliate links. As an Amazon associate I earn from qualifying purchases at no additional cost to you.
- Table of contents: How to install door molding
- Why install decorative door molding
- Tools and materials list
- Choosing the right door trim
- Step by step guide to installing molding
- Frequently asked questions
- Before and after photos
Adding a bit of extra trim and molding to the top of your doorway is a pretty easy process. In this project we were just adding to the framework and not removing any existing trim.
The first step was measuring our doorway. Then, looking around, I saw the potential for the back sliding door and both living room windows. Our simple project just turned into three.

This is our own personal experience. Remember to seek professional guidance, follow manufacture instructions, and practice tool safety.
How to Install Door Molding
Installing door molding is a simple upgrade that can transform any room. Whether you’re looking to add classic trim, crown molding, or something more modern, door casing helps define your space and tie everything together.
To top it off this DIY project is budget friendly and can be done in just a day or two. Giving your home an updated finish that looks like it was always meant to be there.
Moulding vs. Molding- Before we continue, let’s talk about the different ways to spell molding. It’s common in the US to spell molding without adding the U. In other parts of the world, people like to keep the U. Most professionals use the spelling with the U- moulding. However, since I reside in the united states, people searching how to do this project like to drop the U. So we’ll continue with the US version of the word.
Why Install Door Molding
- Enhances the look of any room
- Draws the eye up and makes the room feel taller
- Budget friendly with a custom, high-end feel
- DIY project that only takes a few hours

Tools and Materials List
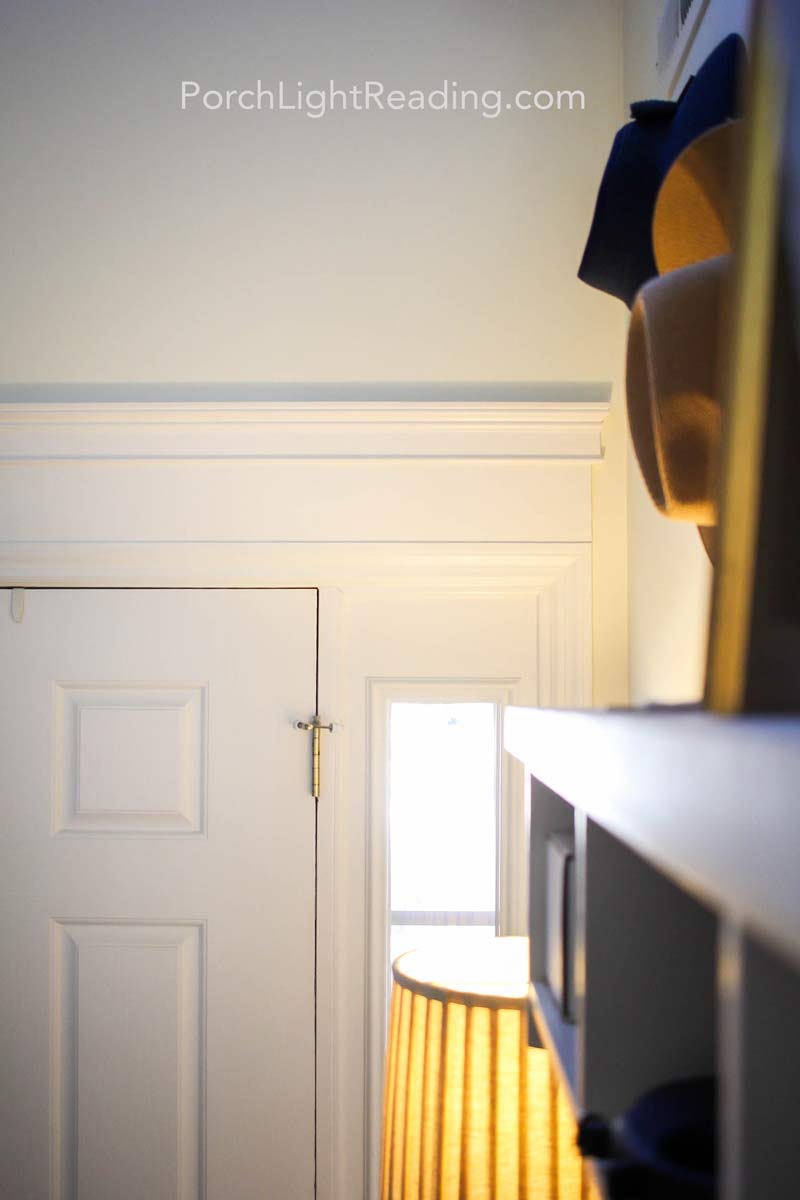
For a uniform look, we decided to use a baseboard on top of the doorframe. The baseboard is the same thickness as the existing trim and allowed us to continue the frame upwards without it looking like an afterthought. Adding an ornamental molding on top of flat baseboard trim, finished the look off with an elegance that fit our home’s existing style.
Be sure to measure for your own doorway and framing needs.
For this project we used Ornamental Mouldings 1-1/16-in x 3-1/2-in x 8-ft Primed Wood White hardwood Casing and 4 inch, flat, baseboard trim from Lowes.
- Materials
- Door trim molding (For this project we used 1-3 inch ornamental molding and 1- 4 inch baseboard trim)
- Wood filler
- Caulking
- Paint
- Tools
- Measuring tape
- Miter saw
- Nail gun and finishing nails
- Level
- Wood glue
- Sandpaper
- Protective eyewear
Choosing The Right Door Trim
Before you start, you’ll want to decide on the type of molding that fits your home’s aesthetic. By choosing the look before you head to the home improvement store, you’ll easily be able to narrow down what works for you without getting overwhelmed by the different types of options available.
Note: When choosing crown molding, we noticed that in order for this project to sit flush with the trim, we needed a crown molding that was flat on the bottom. Some pieces offer a flared bottom and for this project, those would not work with a trim.
Traditional colonial trim- A clean look with slightly rounded or decorative edges. Works well in classic or farmhouse-style homes.
Craftsman-style trim- Boxy, square edges with a flat, layered appearance. Works well for bungalows, cottages, and modern farmhouse designs.
Modern minimalist trim- Straight, flat boards with no decrorative elements. Works well for contemporary homes with a sleek, clean look.
Decorative crown molding- Adds a luxurious, high-end feel. Works well in formal living areas or historic homes.
Tip: Using baseboards as door trim is a budget friendly way to add a uniform look to your existing framing. Layer with other boards or crown molding to get the design you’re looking for.
Step by Step Guide to Installing Door Molding
Measure and plan- Measure the width of your doorway, noting any problem areas that might need extra touching up, such as caulking. For this project we’ll be installing additional trim just above the doorframe and flaring out an inch on each side for the crown molding.
Choose the trim width based on the room’s style and ceiling height. The wider the trim, the more dramatic the look. For our project we went with 4 inch baseboard trim with a 3 inch crown molding piece on top.
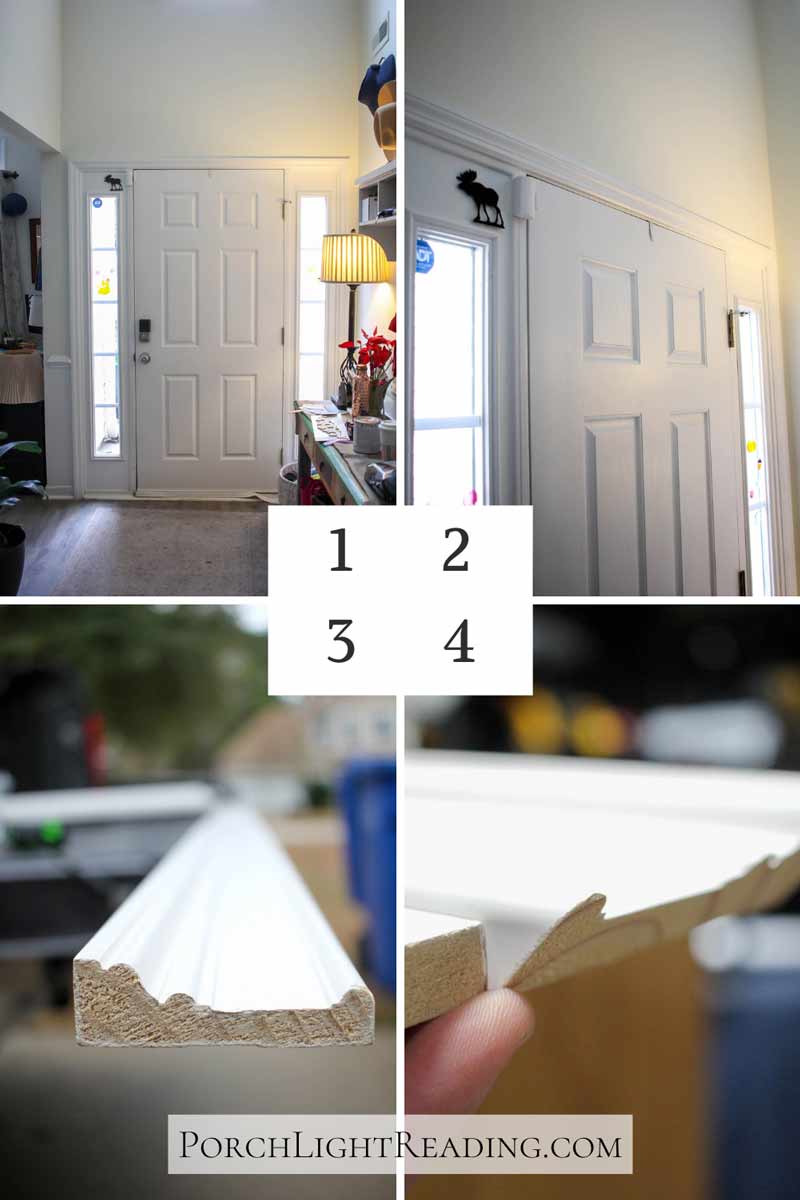
Trim to size- Use a miter saw and cut your trim to fit over the door. For us, we used 4 inch baseboard trim so that it would be the same thickness as the existing doorframe.
Next, add crown molding and additional pieces for a custom look. For this we measured and added an additional half inch on either side of the doorframe for a flared look. We then cut the crown molding at opposing 45-degree angles at the ends and added a second piece of crown molding to finish the corners (those also being cut at 45-degree angles to slide into place).
To better explain this step, take a look at photos 5 and 6 in the steps below.
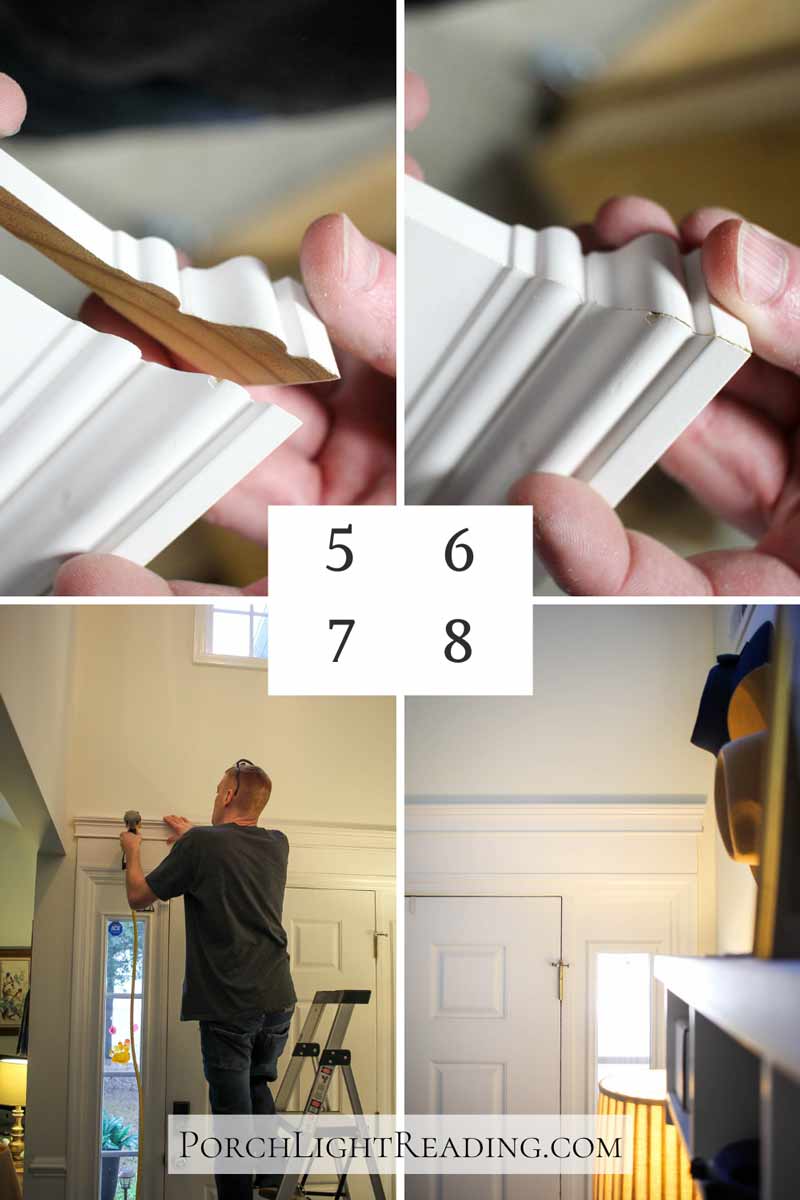
Helpful tip: Always measure twice, cut once! With both the extra inch for the flared look, and cutting the ends at a 45-degree angles to ensure your crown molding wraps around properly, it can get a little tricky before you get the hang of it.
Related Posts:


If you happen to have crown molding in your home already, take a look at how it joins up at the sides. You’ll notice that the molding is cut at different angles along the corners to continue a flawless look. For this project we installed a three-piece trim. Meaning one long trim along the top with two smaller pieces to make the corners that attach to the wall.
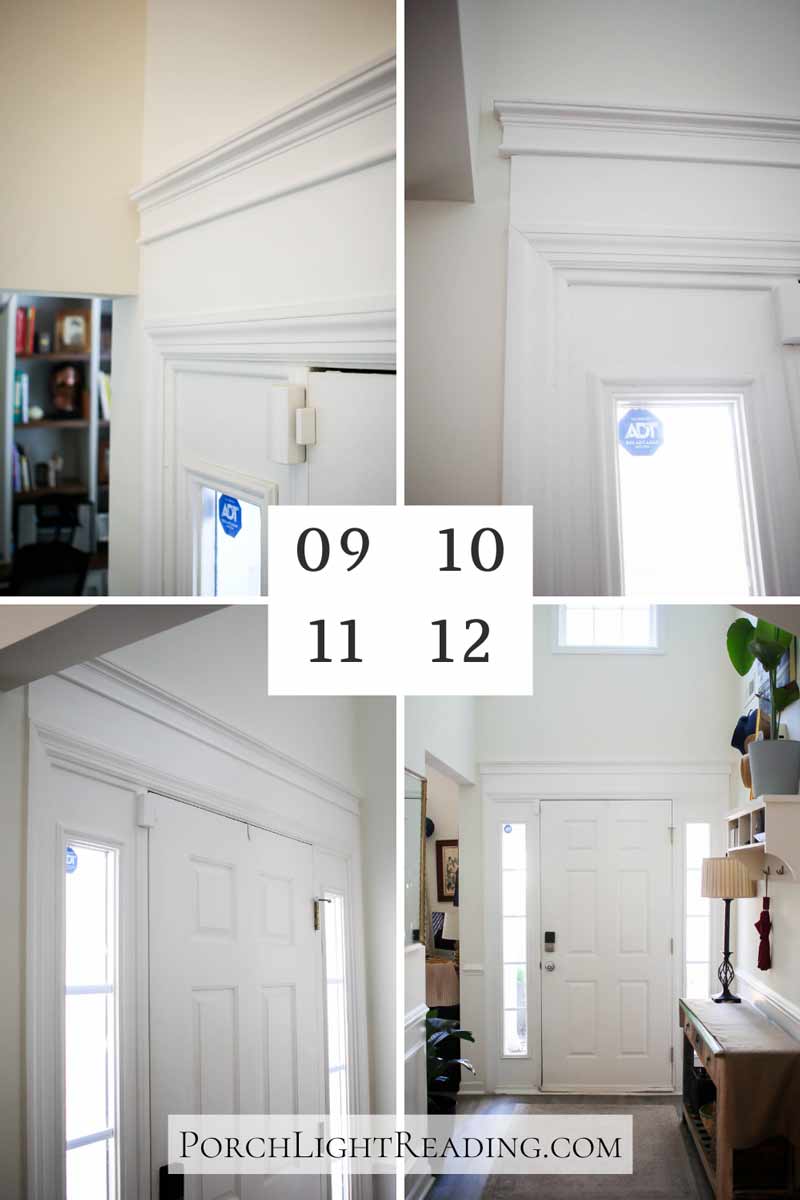
Install the door molding- Hold the first piece against the doorframe, using a level to make sure everything is straight. Nail into place using a brad nailer with finishing nails. Add the crown molding on top of the trim, repeating the process of making sure it is level before using the nail gun to secure it into place. Add the corner pieces to the crown molding by using the nail gun or rather wood glue to prevent cracking.
Caulking, wood filler, and paint- Now that the molding is installed, fill the nail holes with wood filler and allow to dry. While that is drying, caulk the gaps between the molding for a seamless finish. Sand any rough spots and prime and paint to match your existing doorframe.
Frequently Asked Questions
You’ll need a tape measure, miter saw, level, nail gun or adhesive, caulk, and paint for a smooth installation.
Yes. You can use construction adhesive or small finishing nails with a hammer if a nail gun isn’t available.
Use a miter saw at a 45-degree angle for inside and outside corners to help create a snug fit.
Use caulking along the seems and smooth it out with a wet finger for a clean finish before painting.
A standard installation takes a couple of hours depending on your skill level and tools available.
Before and After Photos
Installing door molding is an easy way to elevate your homes style. Whether you choose a modern, farmhouse, or classic trim, with a few pieces of trim and molding, you can make a huge difference in the look and feel of your home.
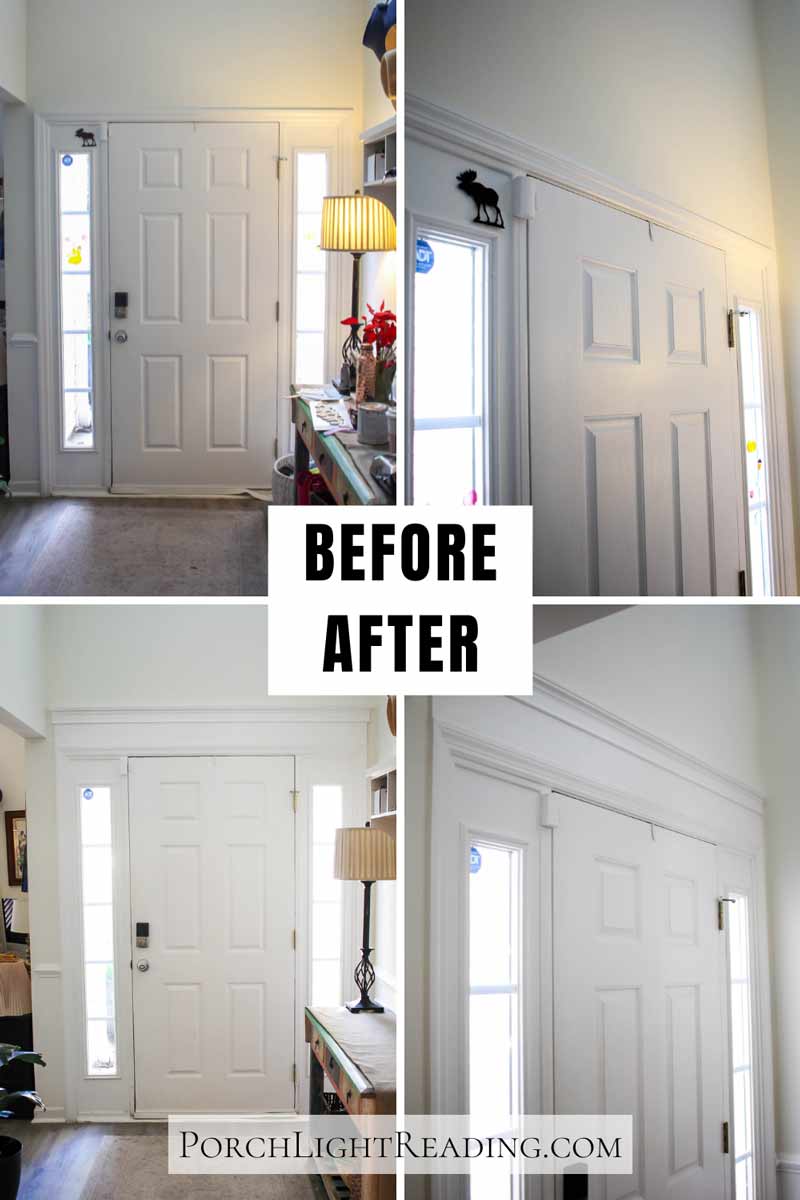
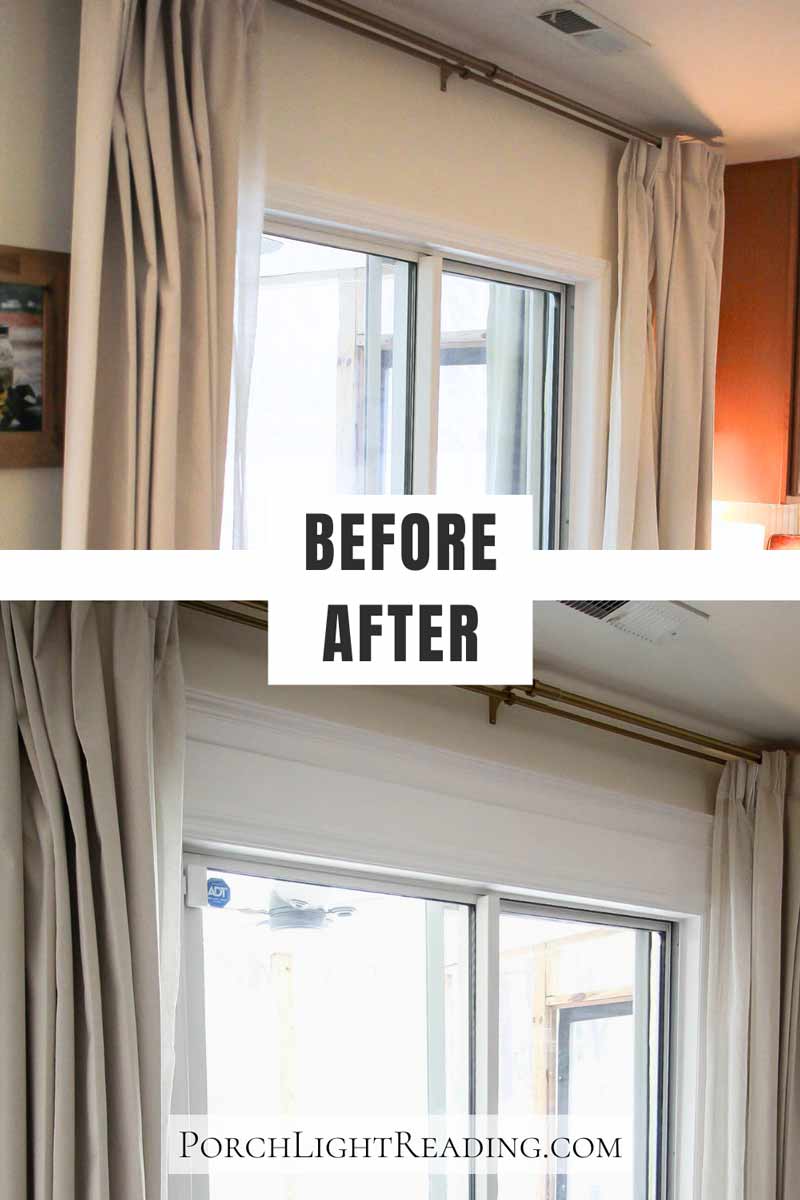
Some might think this was a silly way to spend our day off together but I have to tell you, it’s a lot of fun turning a house into a home with the person you most enjoy.
We’ll see you on our next project!
You also might like…

Back to Home and Garden
Like this idea? Save this post to Pinterest for later by clicking the Pin below!