
Last Updated on April 28, 2026 by PorchLightReading
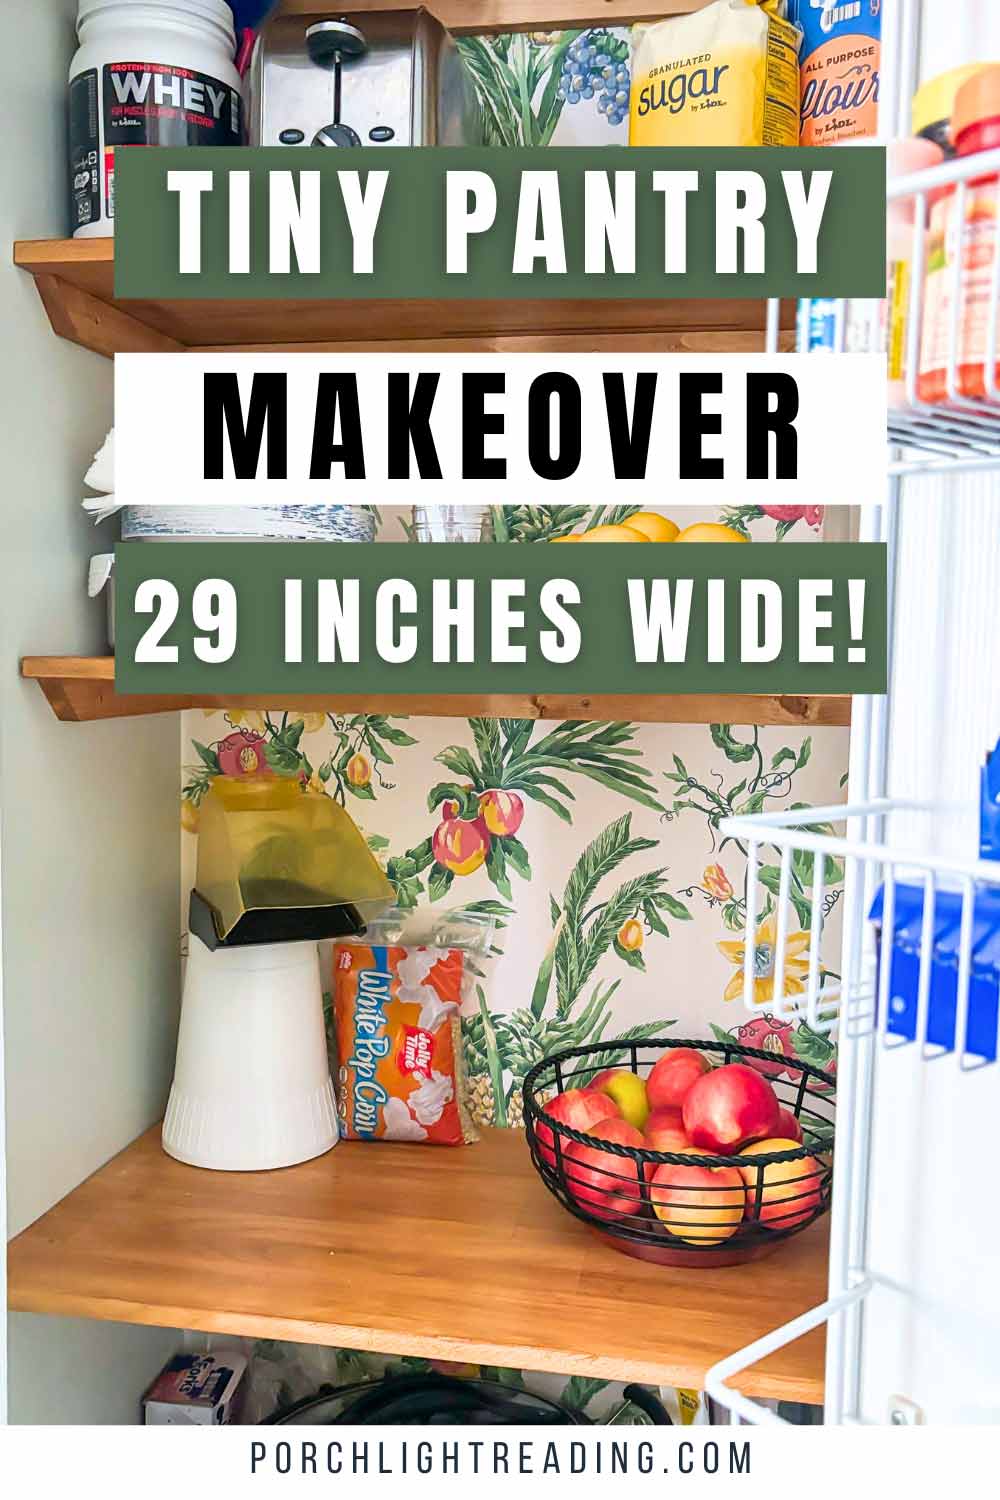
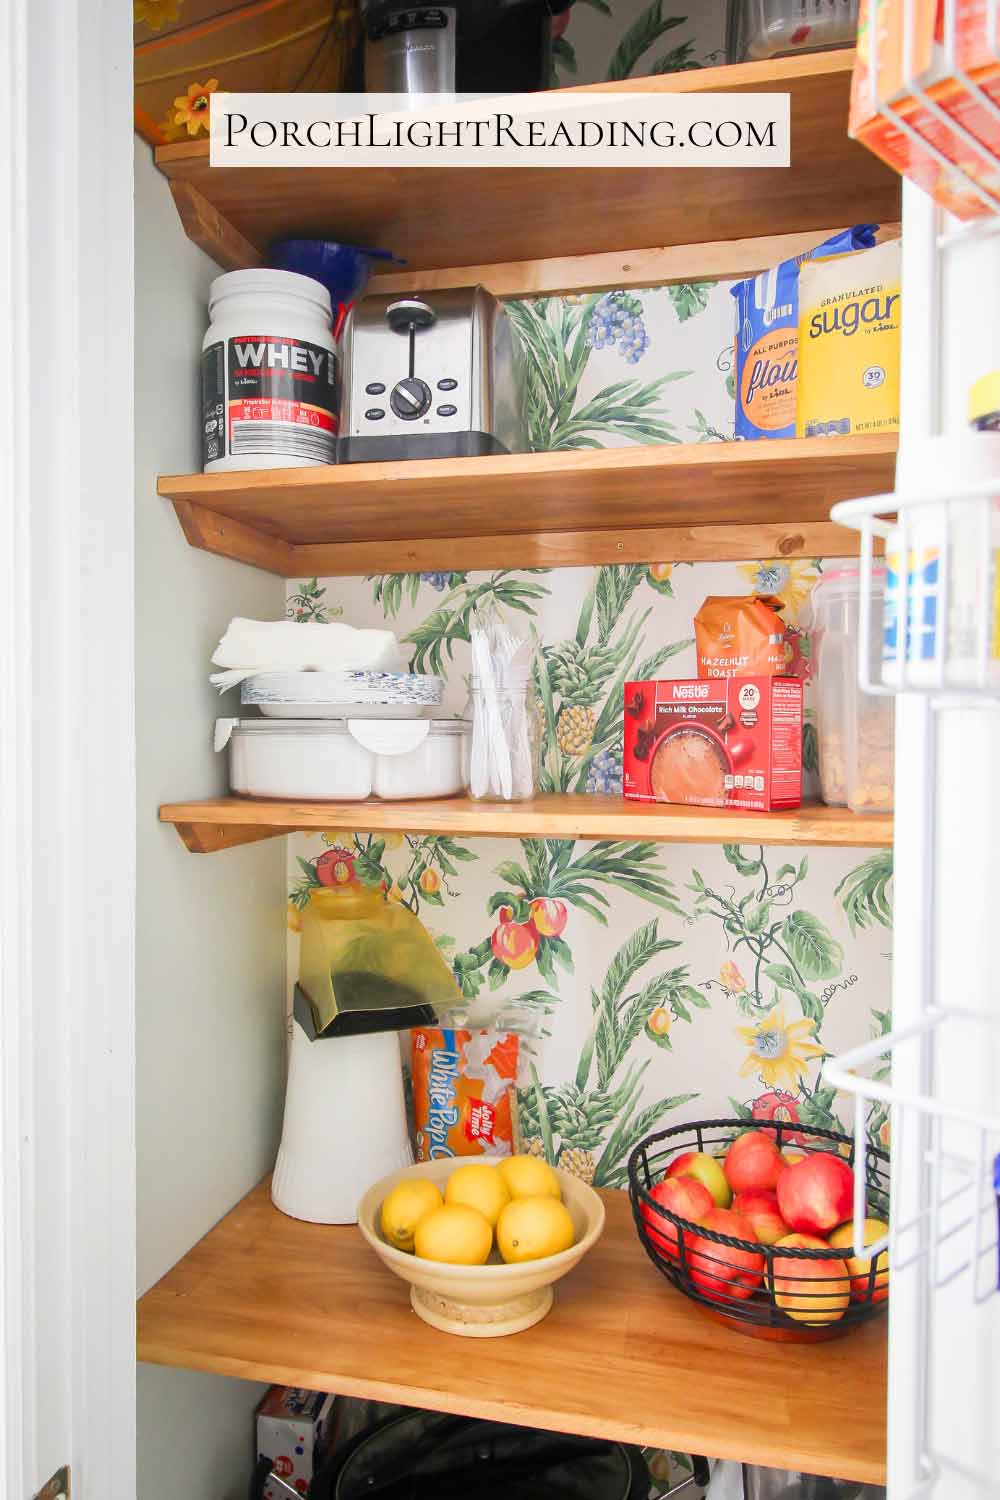
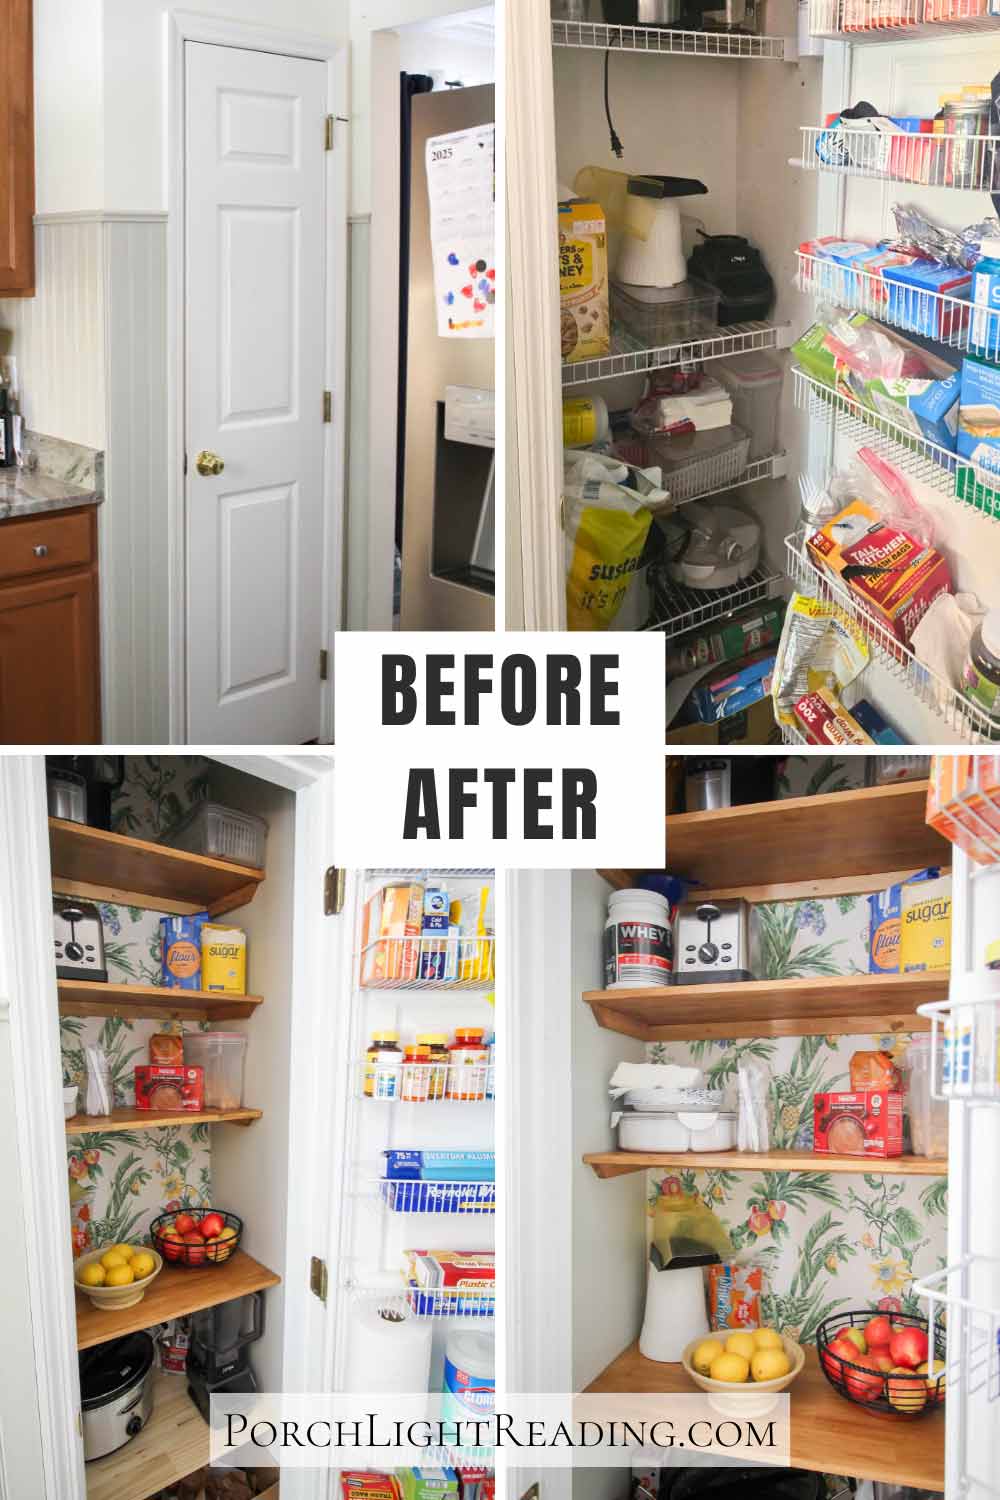
Small pantry makeover for a tiny 29 inch pantry. From wire racks to DIY wooden shelving! Step by step tutorial.
Most would consider our pantry small and at 29 inches, I guess I can’t really argue.
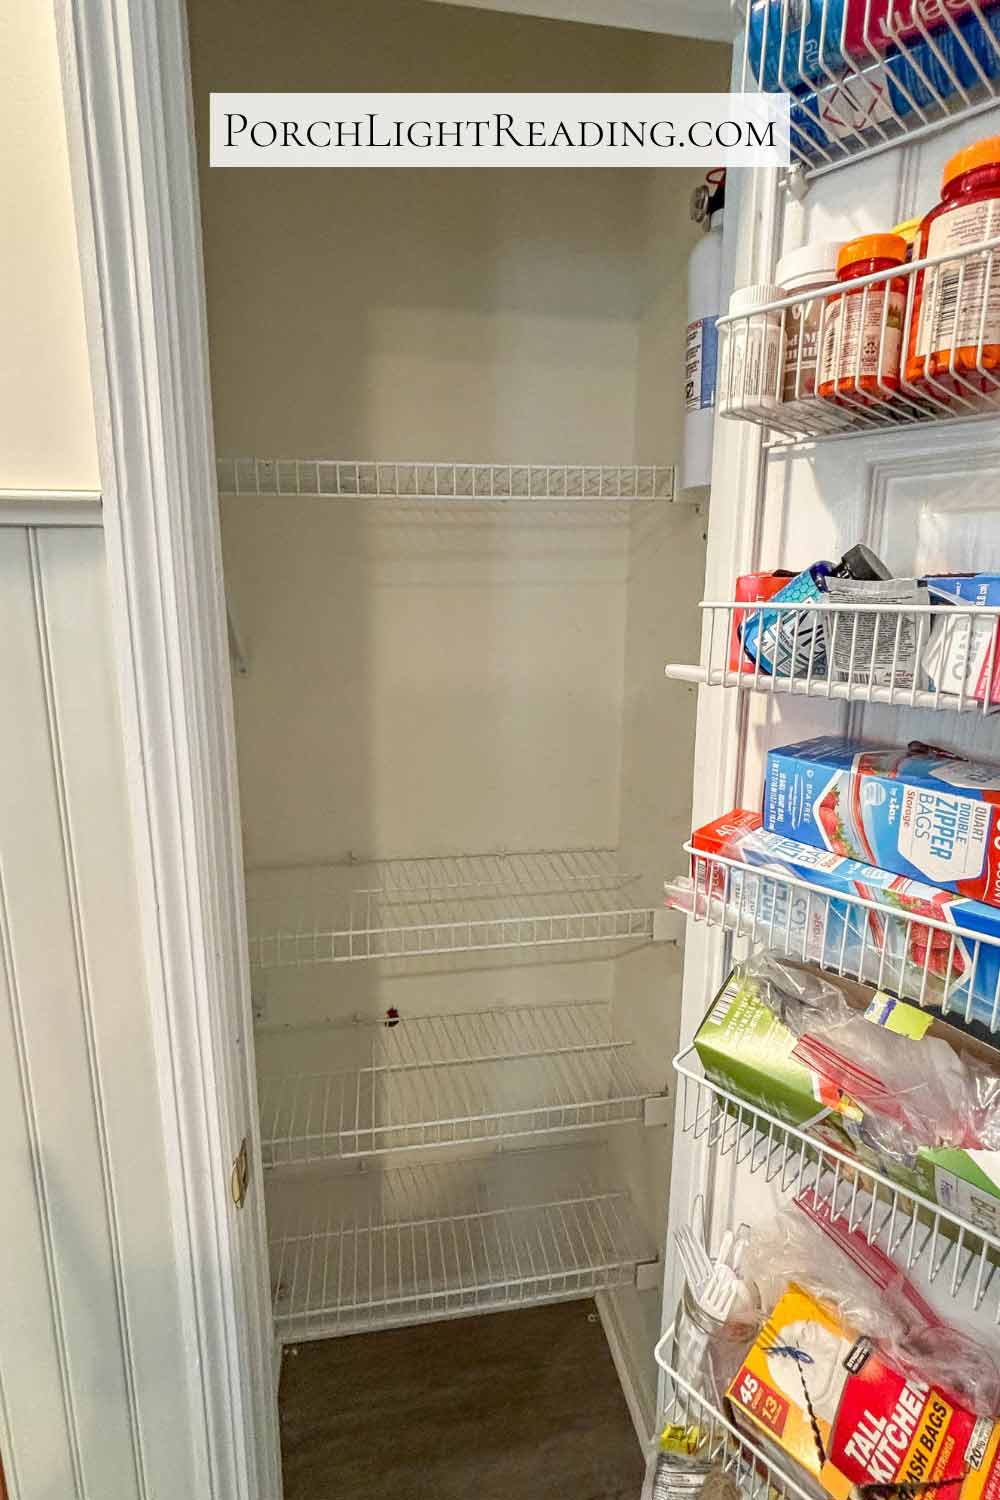
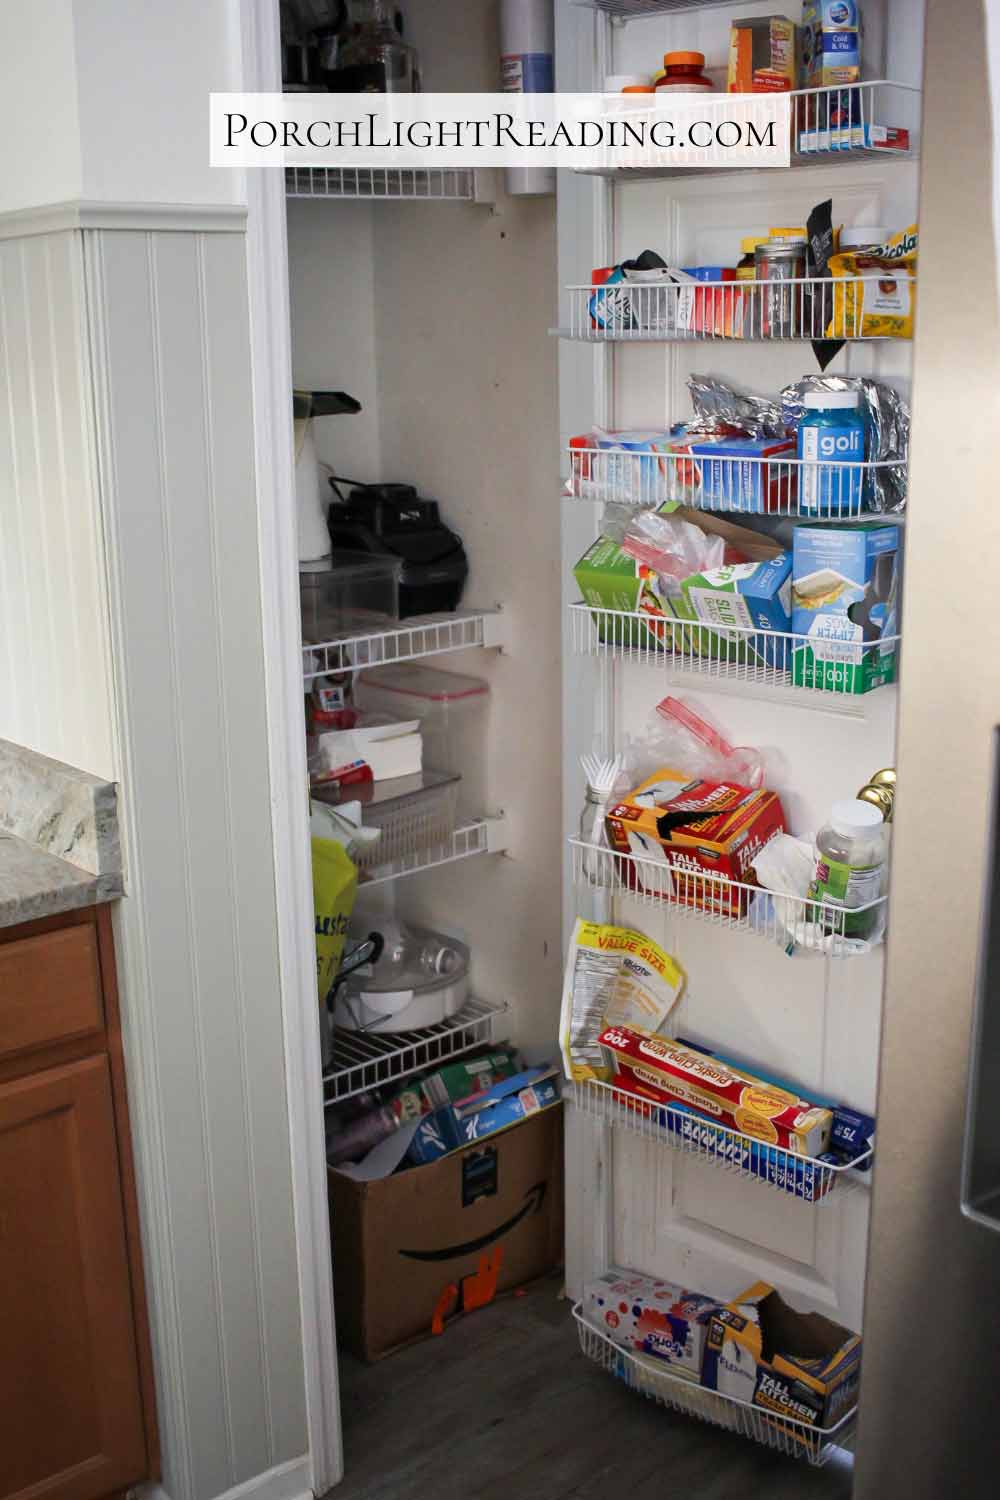
It has a few flaws, sure. It’s 4 wire racks at only 12 inches deep with one missing right in the middle. But where you might see small, I see potential! Although it may have a tiny footprint, it can hold quite a lot if you get a little creative and stay organized.
So if you’re working with a tiny pantry, especially something narrow like ours (just 29 inches wide), this simple makeover is a great place to start!
Follow us on…
This post may contain affiliate links. As an Amazon associate I earn from qualifying purchases at no additional cost to you.
- Table of contents: Small panty makeover (Tiny 29 inch narrow pantry)
- Why we replaced the wire pantry shelves
- Design ideas for a tiny pantry
- Materials list
- How to remove a wire pantry and replace with wooden shelves
- How to build wooden pantry shelves
- Adding cord holes for small appliances
- How to organize a tiny pantry
- Lessons learned form our small pantry makeover
- Frequently asked questions
Small Pantry Makeover (Tiny 29 Inch Narrow Pantry)
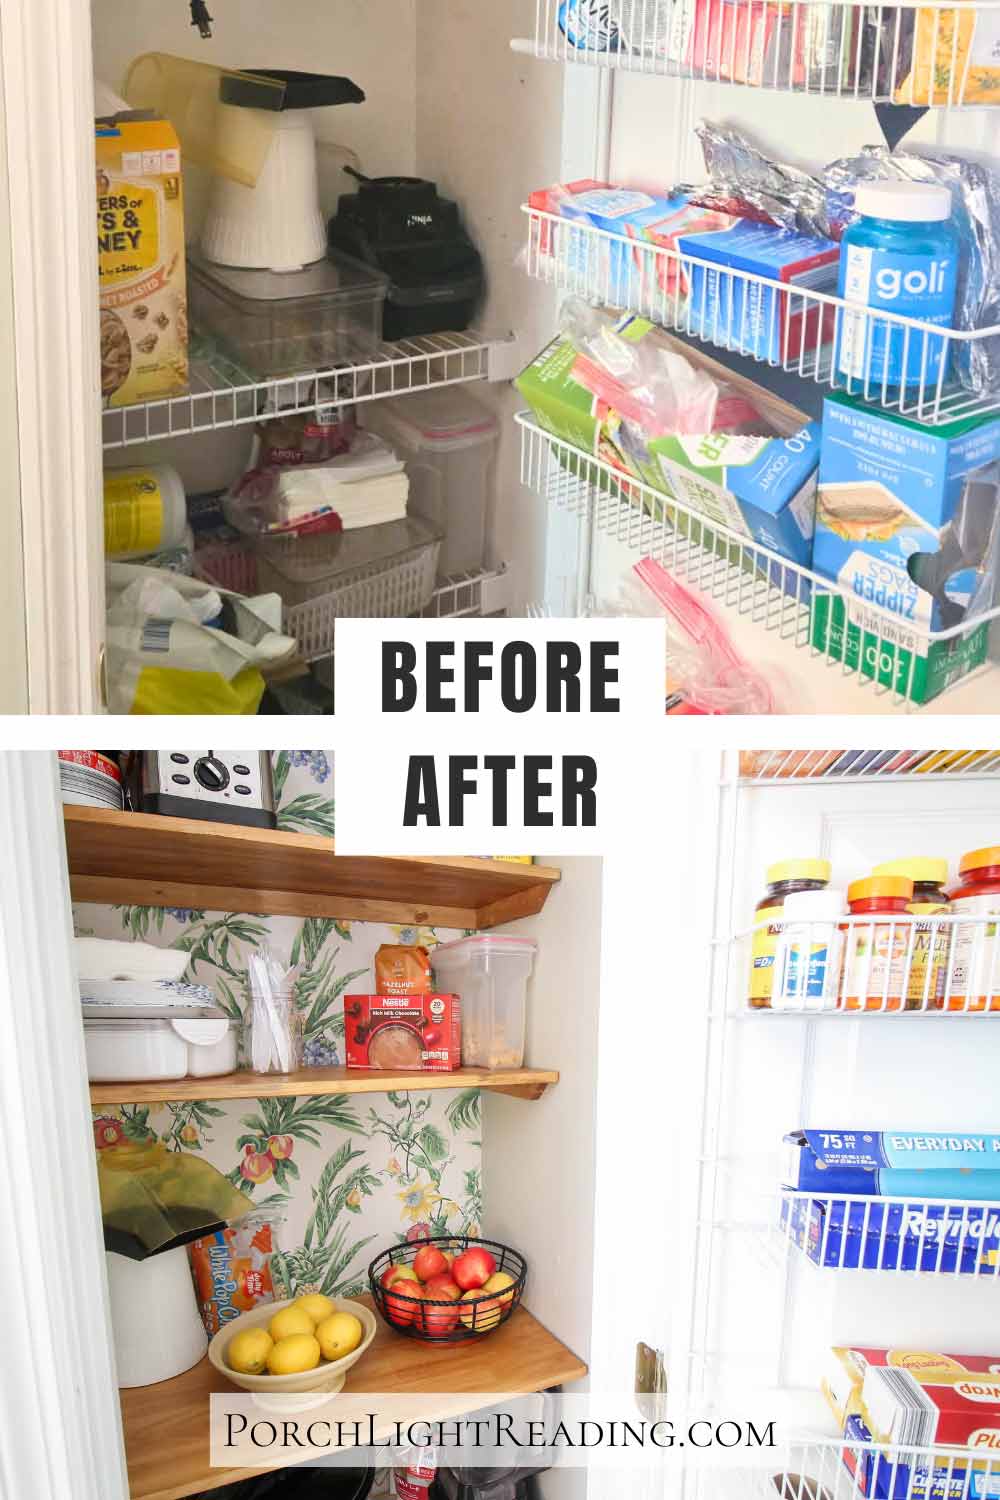
No matter how often I tried to organize and clean up, things were constantly falling over or slipping through the gaps and getting lost somewhere near the recycle bin on the floor.
So we decided to keep it simple and see what we could come up with on a budget, because anything had to be better than the blender falling over and bags of popcorn going missing.
Why We Replaced The Wire Pantry Shelves
Of course the wires were fine, but over time they became more frustrating than helpful.
- Things would easily tip over
- Small items didn’t sit right
- No space for appliances
- Hard to keep organized
When you have a small pantry, every inches matters. And the setup we had just wasn’t working in our favor.
Design Ideas For a Tiny Pantry
The first thing you’ll want to do is think about how you’ll use the space. Do you have taller appliances such as a blender that you want to fit, or other tall items like cereal boxes or protein jars?
Being able to fit everyday items is key to making this space more usable, and it starts by simply measuring a few things you store in the pantry. This will help decide how much space you need between each shelf.
- What we want
- Solid shelves that hold everyday items
- Deeper shelves for the bottom
- A larger counter space area
- A hole for cords and small appliances
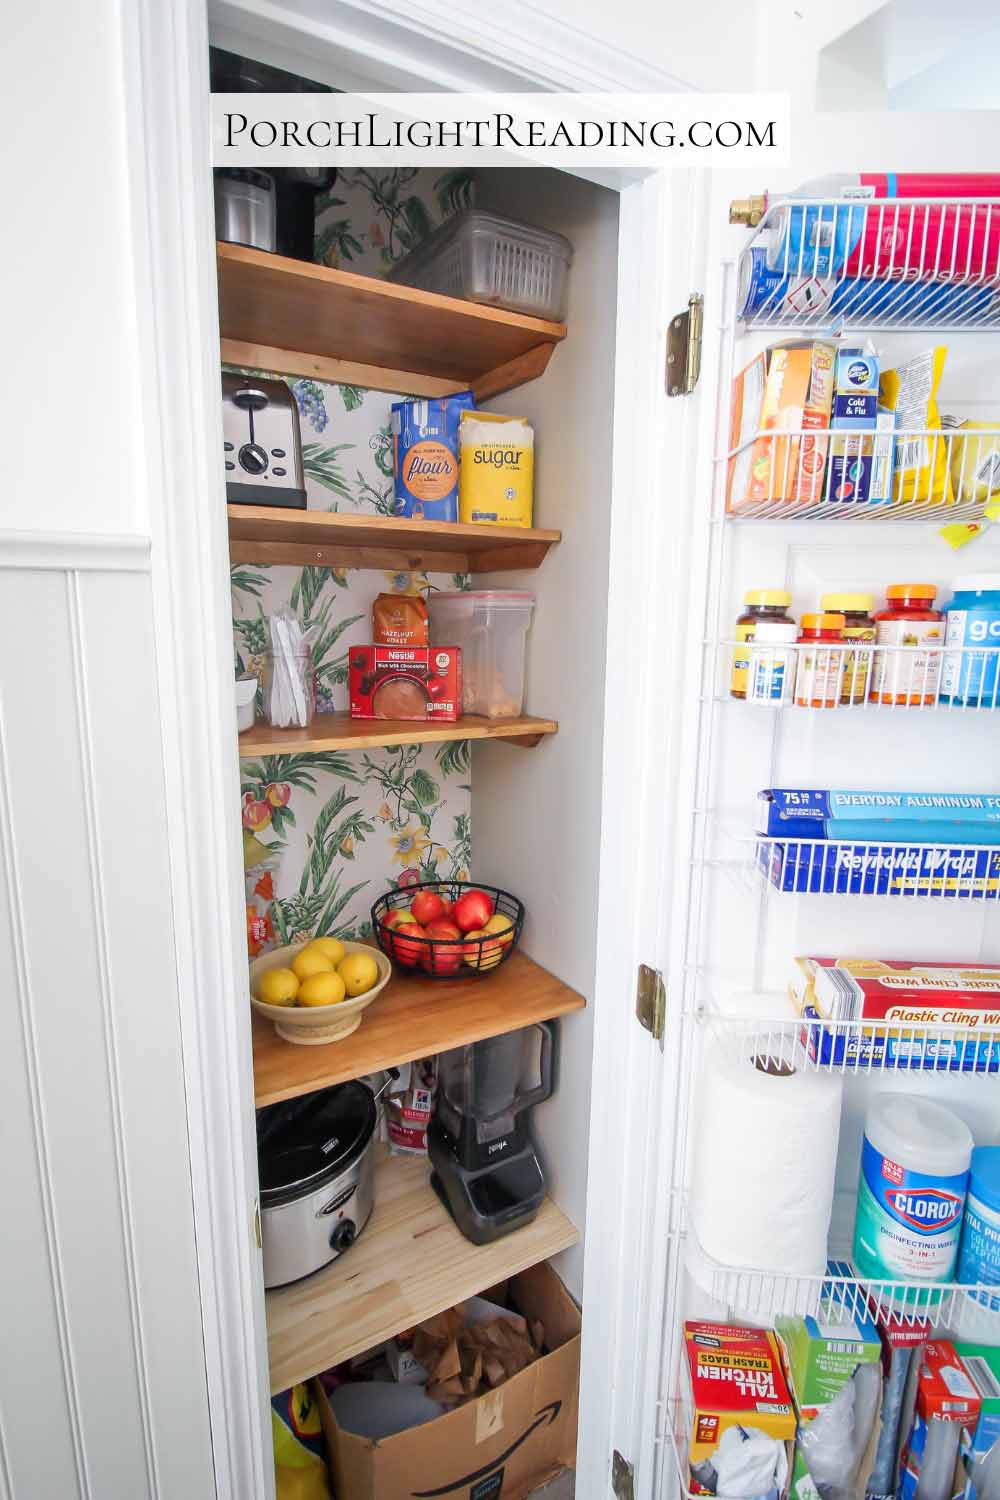
The top three shelves are 12 inches deep which work well for cereal, canned goods, and smaller containers. It keeps things within easy reach without items getting lost in the back.
- Top three shelves at 12 inches deep
- Canned goods
- Dry food
- Smaller containers and supplies
The bottom two shelves are 16 inches deep to store small appliances and heavier items.
- Bottom two shelves at 16 inches deep
- Crock pot
- Blender
- Toaster
- Paper towels and other large items
Once you have a rough draft of what you want and how you’ll use the space, you can get to work on the hard stuff.
This is our own personal experience. It is recommended that you seek professional guidance and always follow manufacture instructions.
Materials List
Materials we used for our own small DIY pantry makeover. 5- 29 inch wooden shelves, including stain and other supplies needed.
- Materials
- 1- 3/4th inch x 16in x 6ft project board (2 bottom shelves)
- 2- 3/4 inch x 12in x 6ft project board (4 top shelves)
- 3- 1 inch x 2in x 8ft furring strips (shelving supports)
- Poly/wood stain and rags
- Leftover paint and brush
- Thrift store wallpaper
- Spackle and putty knife
- Screws
- Brad nails
- Tools
- Miter saw
- Measuring tape
- Stud finder
- Nail gun
- Level
- Drill and spade bit (to make a hole for the appliance cord)
- Utility knife (to cut wallpaper to size)
- Sand paper
- Safety glasses
How To Remove a Wire Pantry and Replace With Wooden Shelves
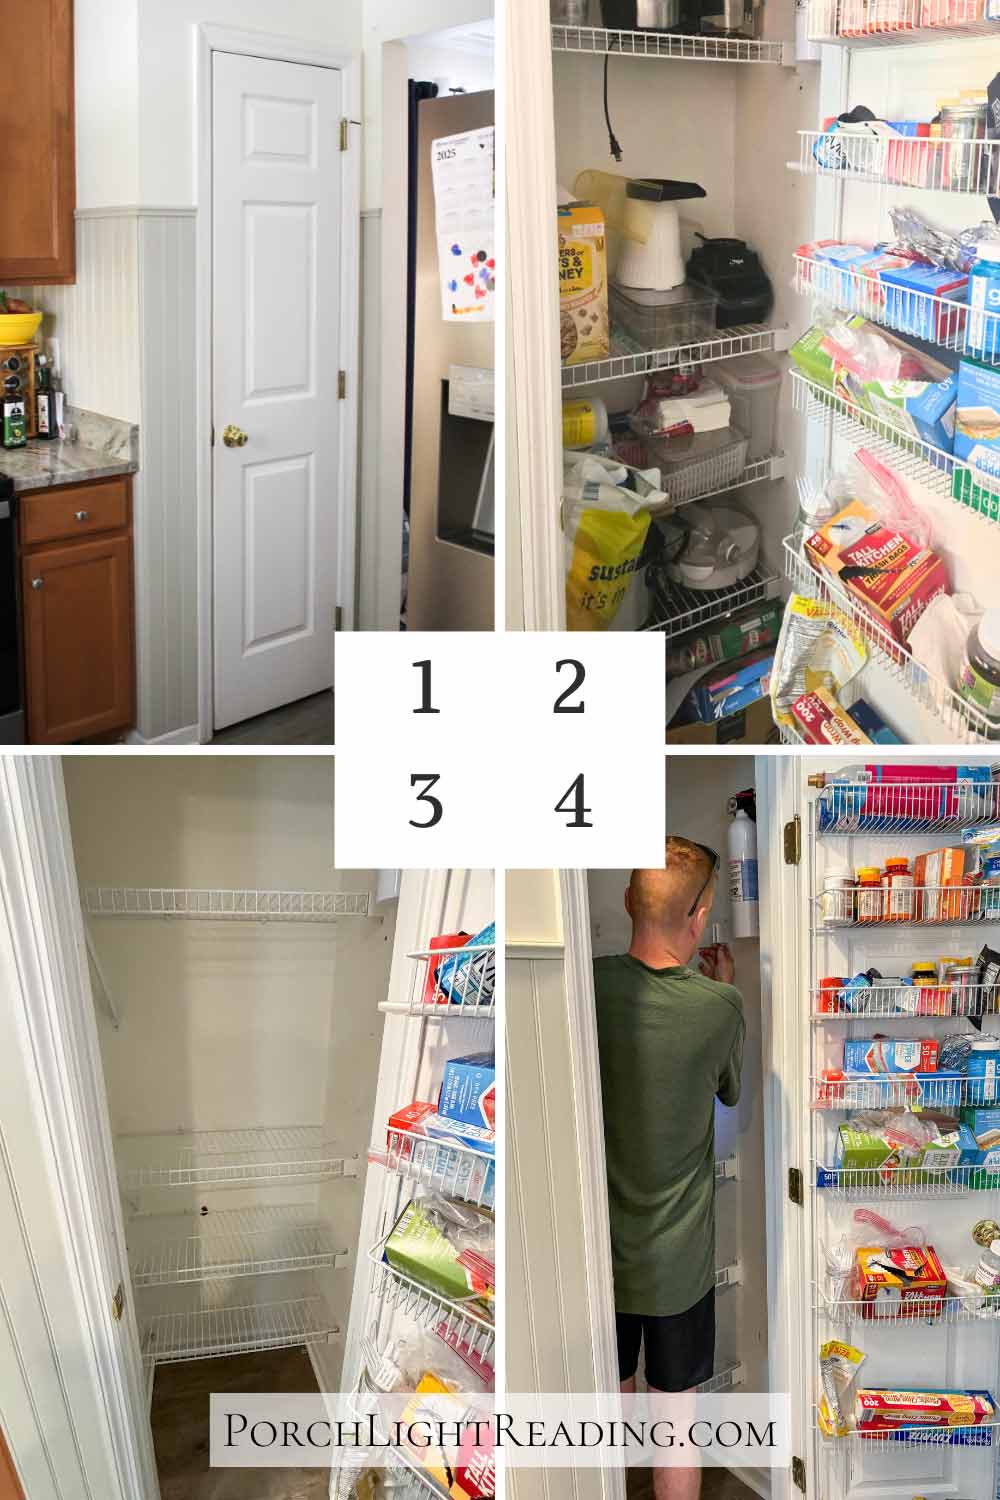
Remove the wire shelving- The first step is to clean out the closet and remove the wire shelving using a screwdriver/drill and a bit of elbow grease.
Even though we only had four wire shelves to remove, it left a fair amount of holes in the walls and some needed a bit of tugging to remove.
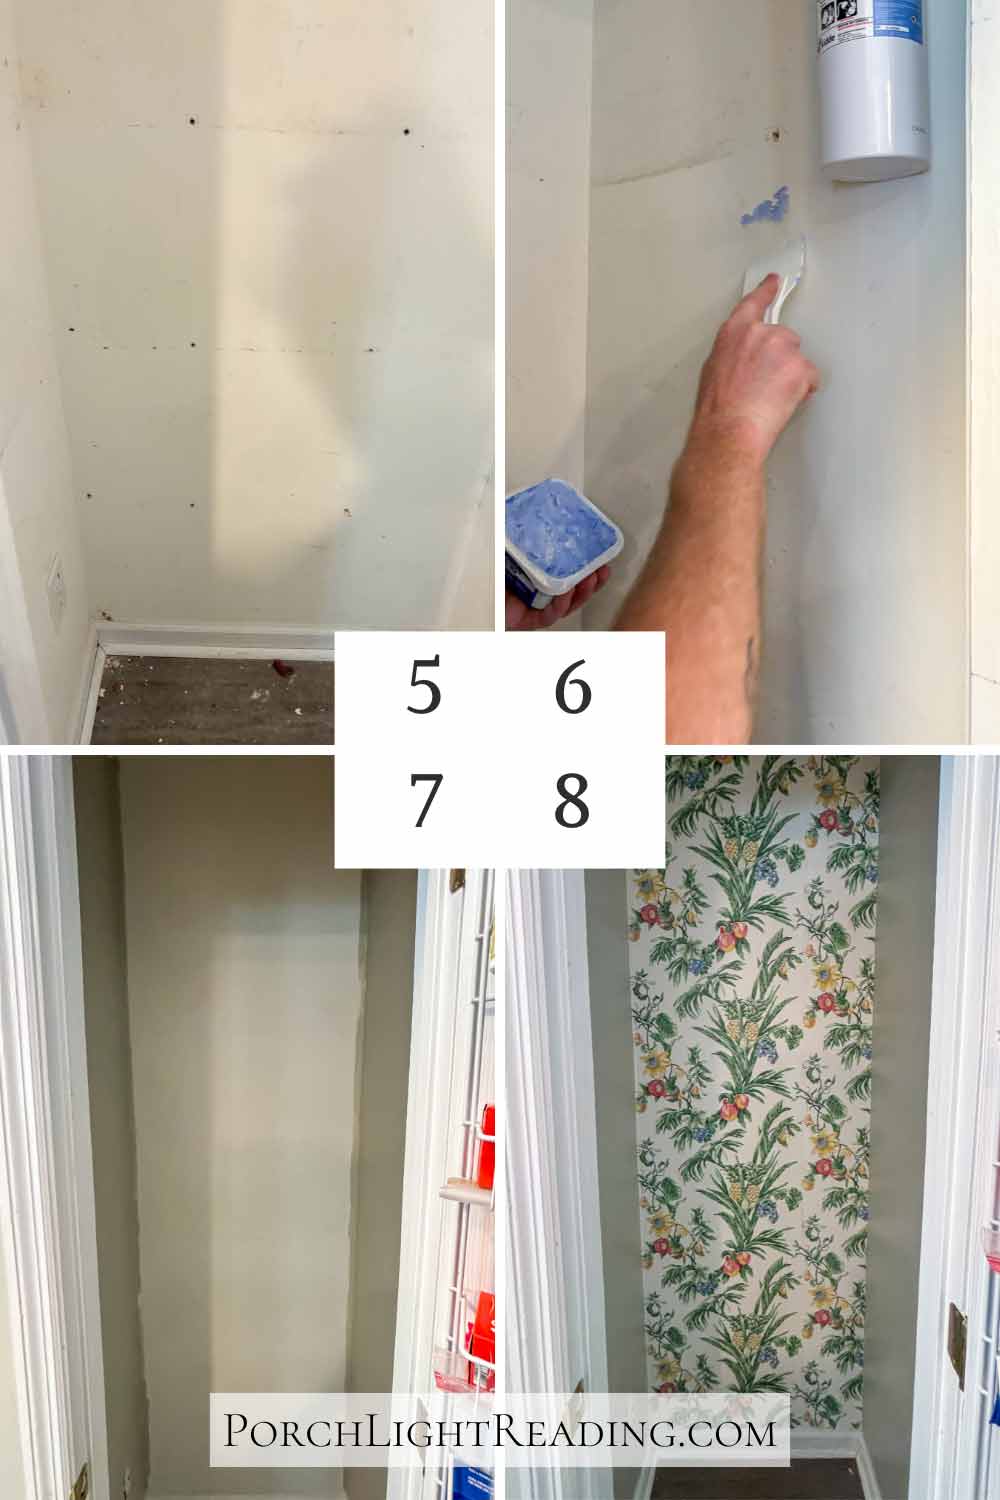
Patch and prep the walls- Fill the holes with putty and sand everything smooth.
Paint the pantry- You may think you can skip this part, but after removing the wire shelving you’ll see just how necessary painting is. For this project we used leftover paint from another home project.
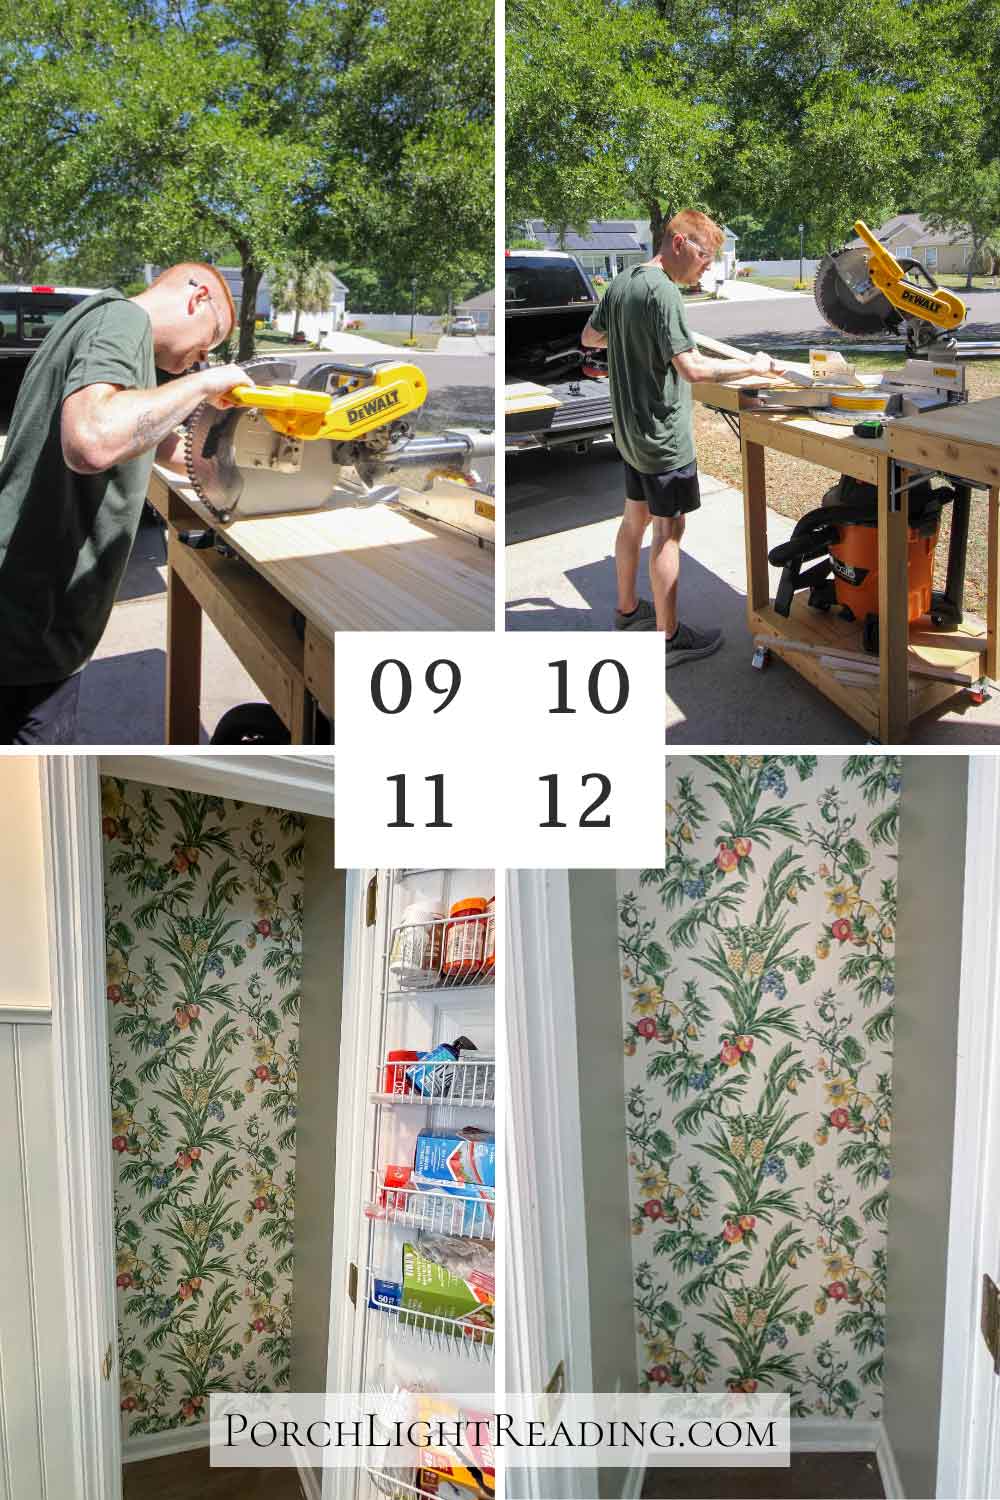
Wallpaper (optional)- I love a good thrift store find and a while back I picked up some wallpaper for a dollar!
At the time I didn’t know what I was going to use it for. But since this was my first time applying wallpaper, what better project then the back of a closet where I can hide any imperfections!
Install the wooden shelves- Using a stud finder, mark along the three walls where each stud is and lightly mark where the shelving will go.
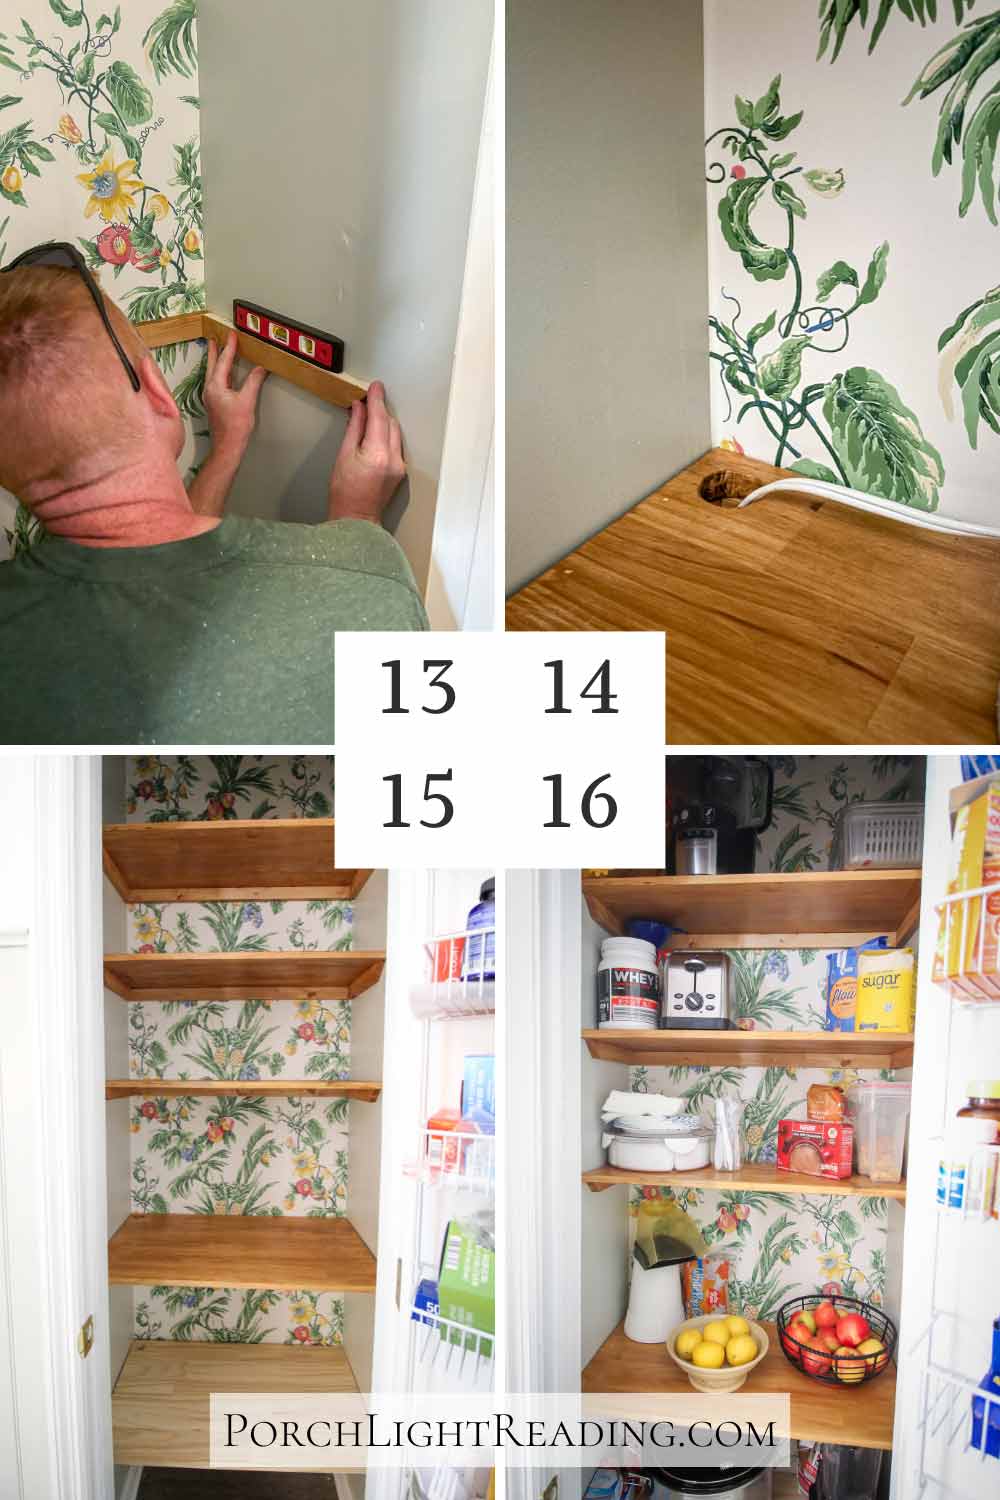
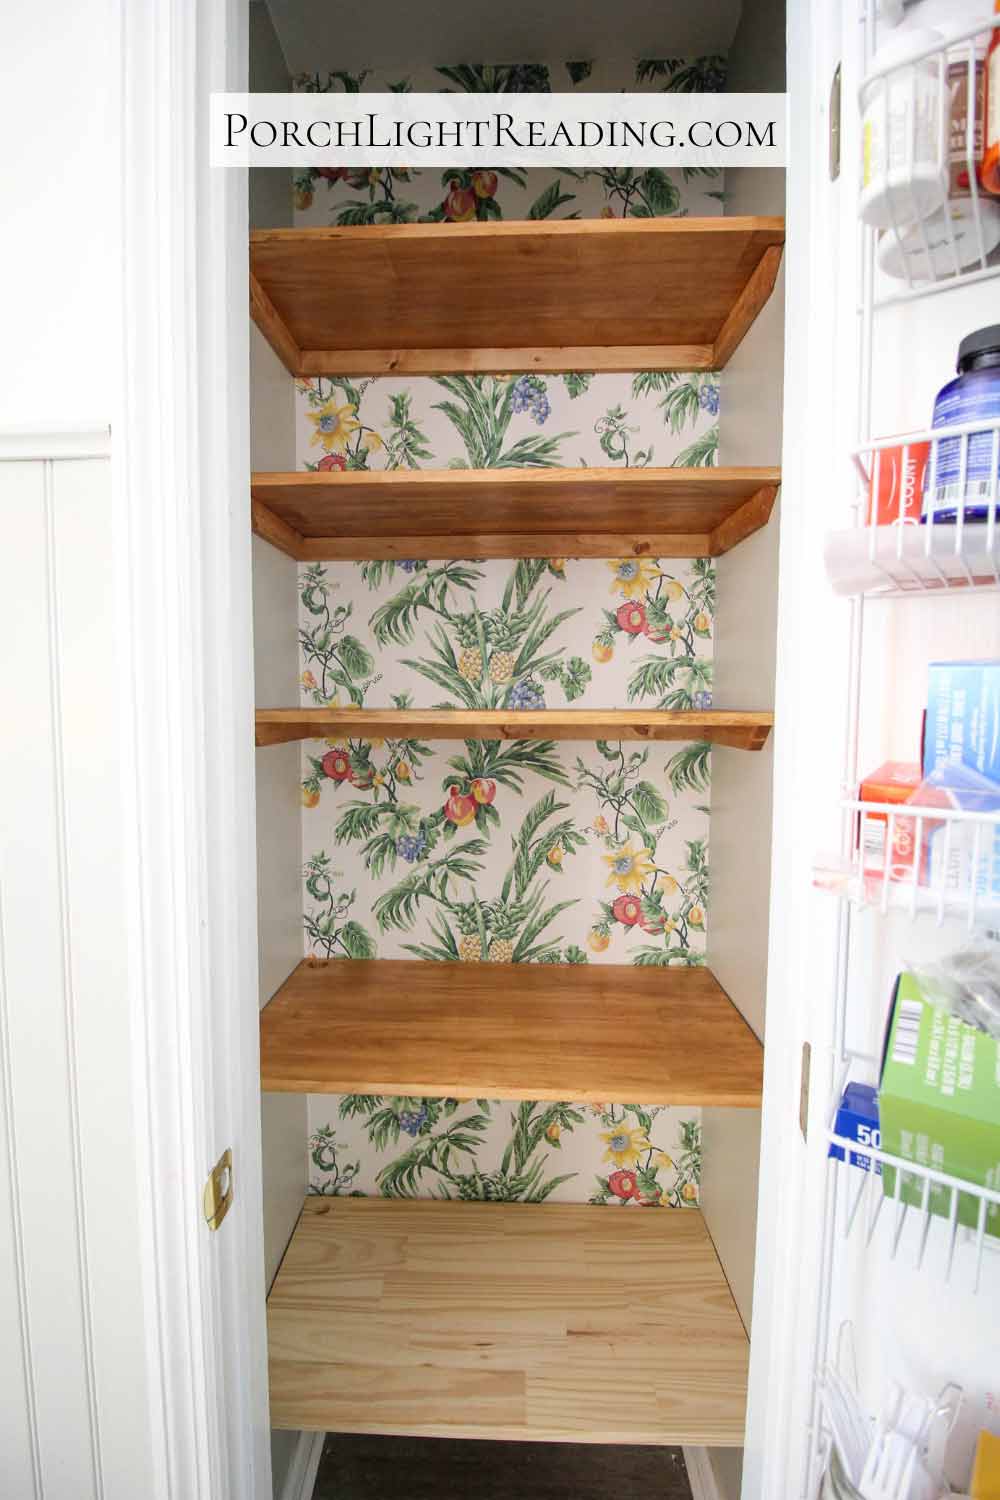
Secure the supports to each wall using screws and place the shelves on top of the supports, making sure everything is square and level. Use a nail gun to attach the shelves to the supports.
Add finishing touches- At this point you can finally see the end in sight! This is a great time to install any lighting you might need inside the pantry.
Since our pantry doesn’t have it’s own light, we will be installing motion sensor strip lighting along the sides of the door and at the bottom of each shelf.
How To Make Wooden Pantry Shelves
This is really where all the planning and measuring comes into place. At the home improvement store we picked up 1- 3/4 inch x 16in x 6ft project board for our 2 bottom shelves.
Then we added 2- 3/4 inch x 12in x 6 ft project boards for our 4 top shelves. And finally 3- 1 inch x 2in x 8ft furring strips for the shelving supports.
- 1- 3/4th inch x 16in x 6ft project board (2 bottom shelves)
- 2- 3/4 inch x 12in x 6ft project board (4 top shelves)
- 3- 1 inch x 2in x 8ft furring strips (shelving supports)
Related posts:

Back at home we used our miter saw to cut everything to size and sanded down the edges so they were nice and smooth.
For the shelving supports we decided to make them an inch shorter then the shelves and cut the front facing the pantry door at a 45 degree angle. This would hide the supports a tad without sacrificing the proper support needed.
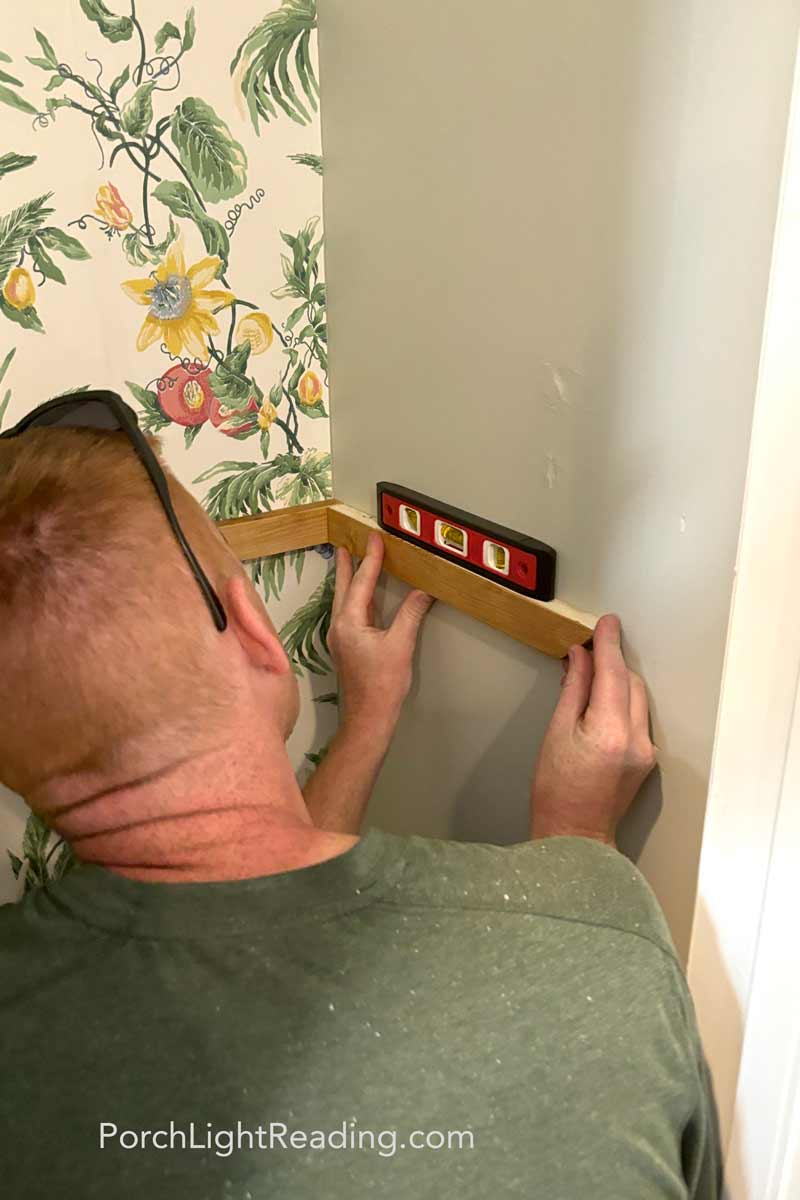
Once cut, we used a damp cloth to wipe them all down to remove any dust. We then stained the shelves and supports to match the color of the kitchen cabinets so everything would look cohesive.
It took a few hours for the shelving to dry properly but in the meantime we marked all of our studs in the walls and laid out where each shelves would go.
Once the shelving and supports were dry, we used screws to secure the supports to the pantry walls, making sure everything was square and level. Add the shelving to each section we nailed the shelves to the supports along the wall using a nail gun and brad nails, making everything nice and sturdy.
Adding Cord Holes For Small Appliances
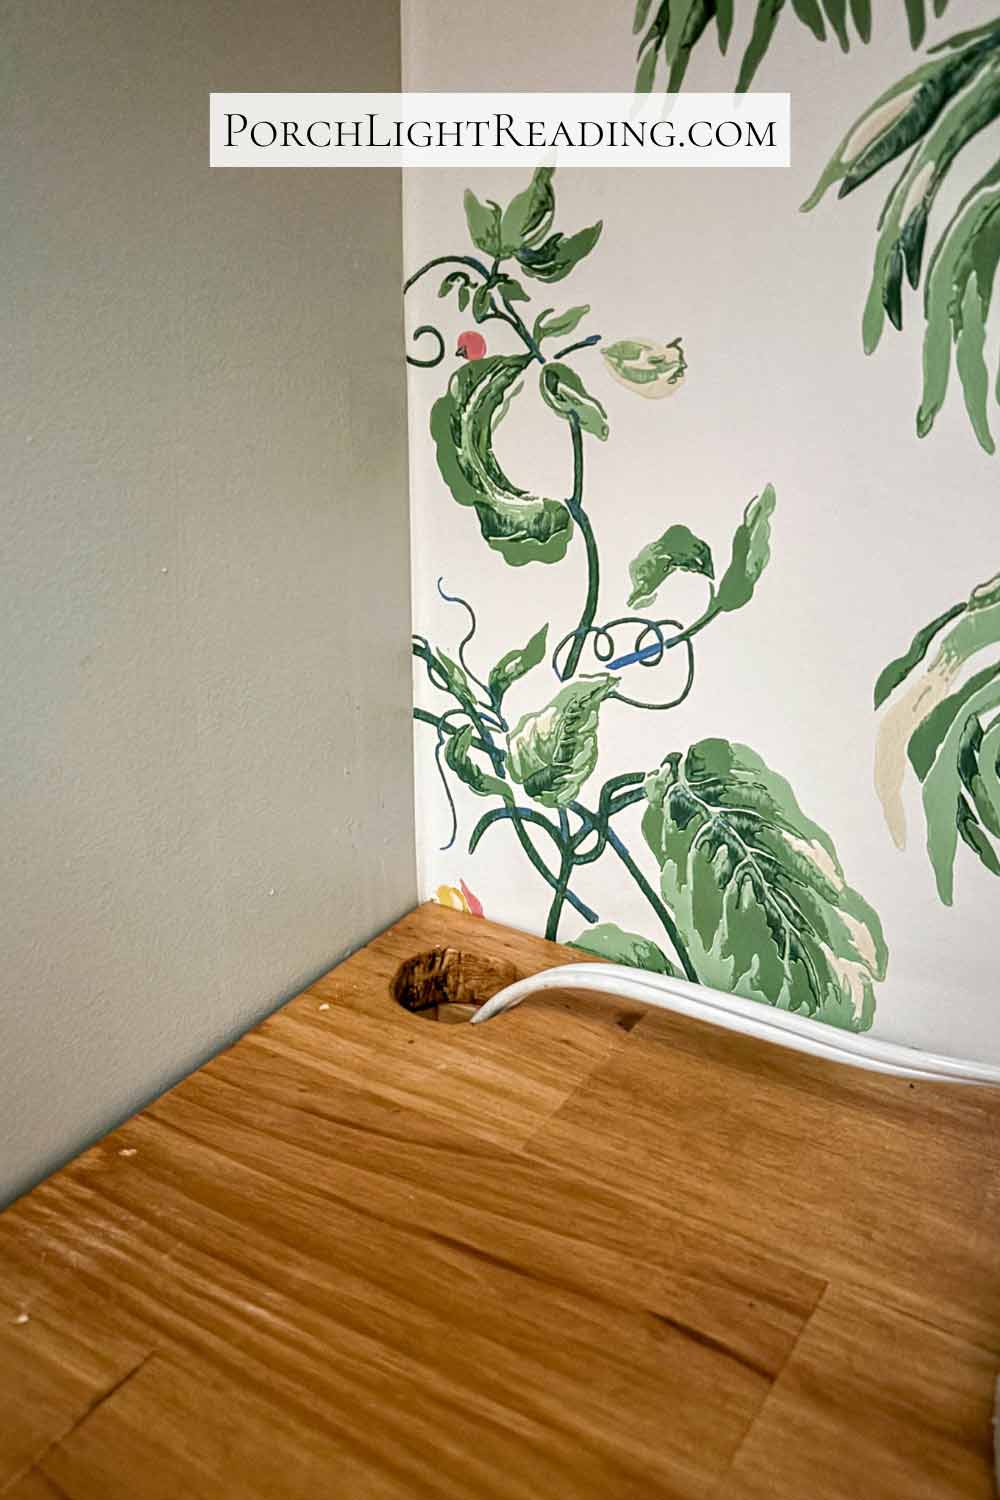
This family has an air popped popcorn problem with zero counter space. So we decided to drill a small hole, with a spade bit, in the back of the bottom two shelves so that the appliance cords could reach the outlet in the pantry.
It’s a small detail, but makes life so much easier! In the future I figure that someone might want to turn that space into a mini coffee bar and with the wider shelf and cute wallpaper, it’ll be the perfect little nook with a few hanging coffee mugs.
Note- In theory drilling a hole for the cord should have been easy, but sadly one of our bottom shelves split. We took some wood glue to save the shelf and placed it on the bottom so it couldn’t be seen.
In the photos you’ll notice that it hasn’t been stained yet and that’s exactly why. We were waiting on the glue to dry and someone (me, myself, and I) got a little too impatient to use the pantry and show the world our little project.
It’ll get stained next weekend, but this is a real life project and sometimes things happen.
How To Organize a Tiny Pantry
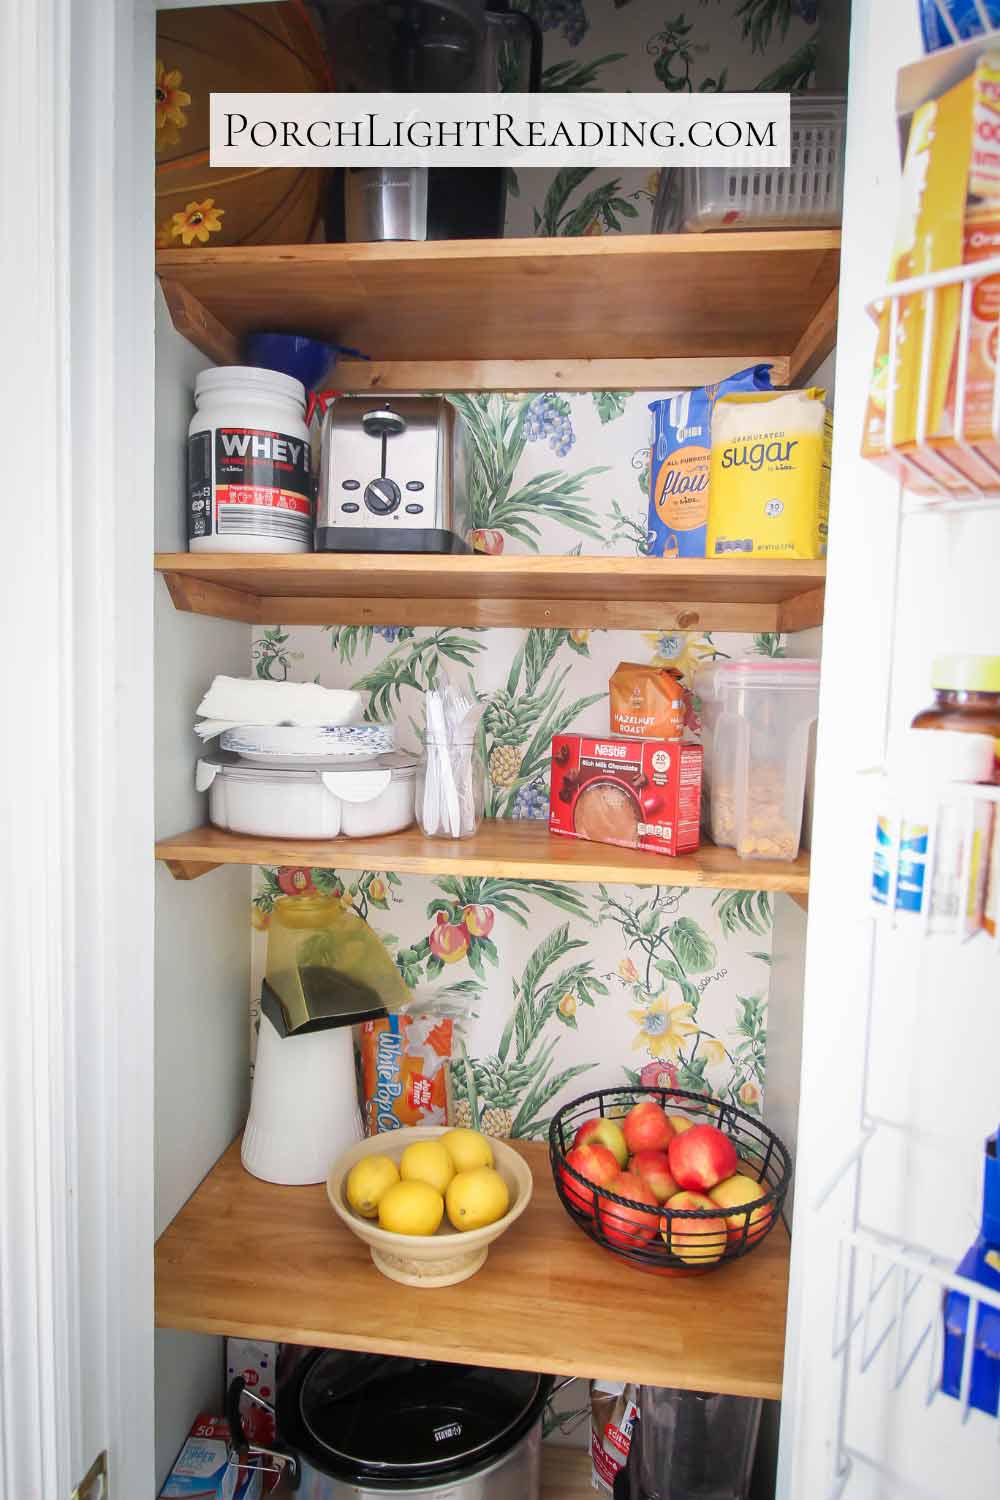
Once the shelving was in, organizing felt so much easier! Grocery day was the next morning and I could not wait to get unpacking!
- Small Pantry Organization Tips
- Keep everyday items at eye level
- Use baskets for smaller items
- Group similar things together
- Use the side walls for hanging small baskets (3 tier woven hanging baskets)
- Use hooks for under the shelves (coffee mug hanger + clip on shelf)
- Keep heavier items lower
- Leave a little open space so it doesn’t feel crowded
Storing everyday small appliances was one of our biggest improvements. Before, our blender, toaster, and crockpot didn’t have a great place to sit and would tip over on the wire shelves. Now they sit on the deeper bottom shelves where they are easy to grab when needed!
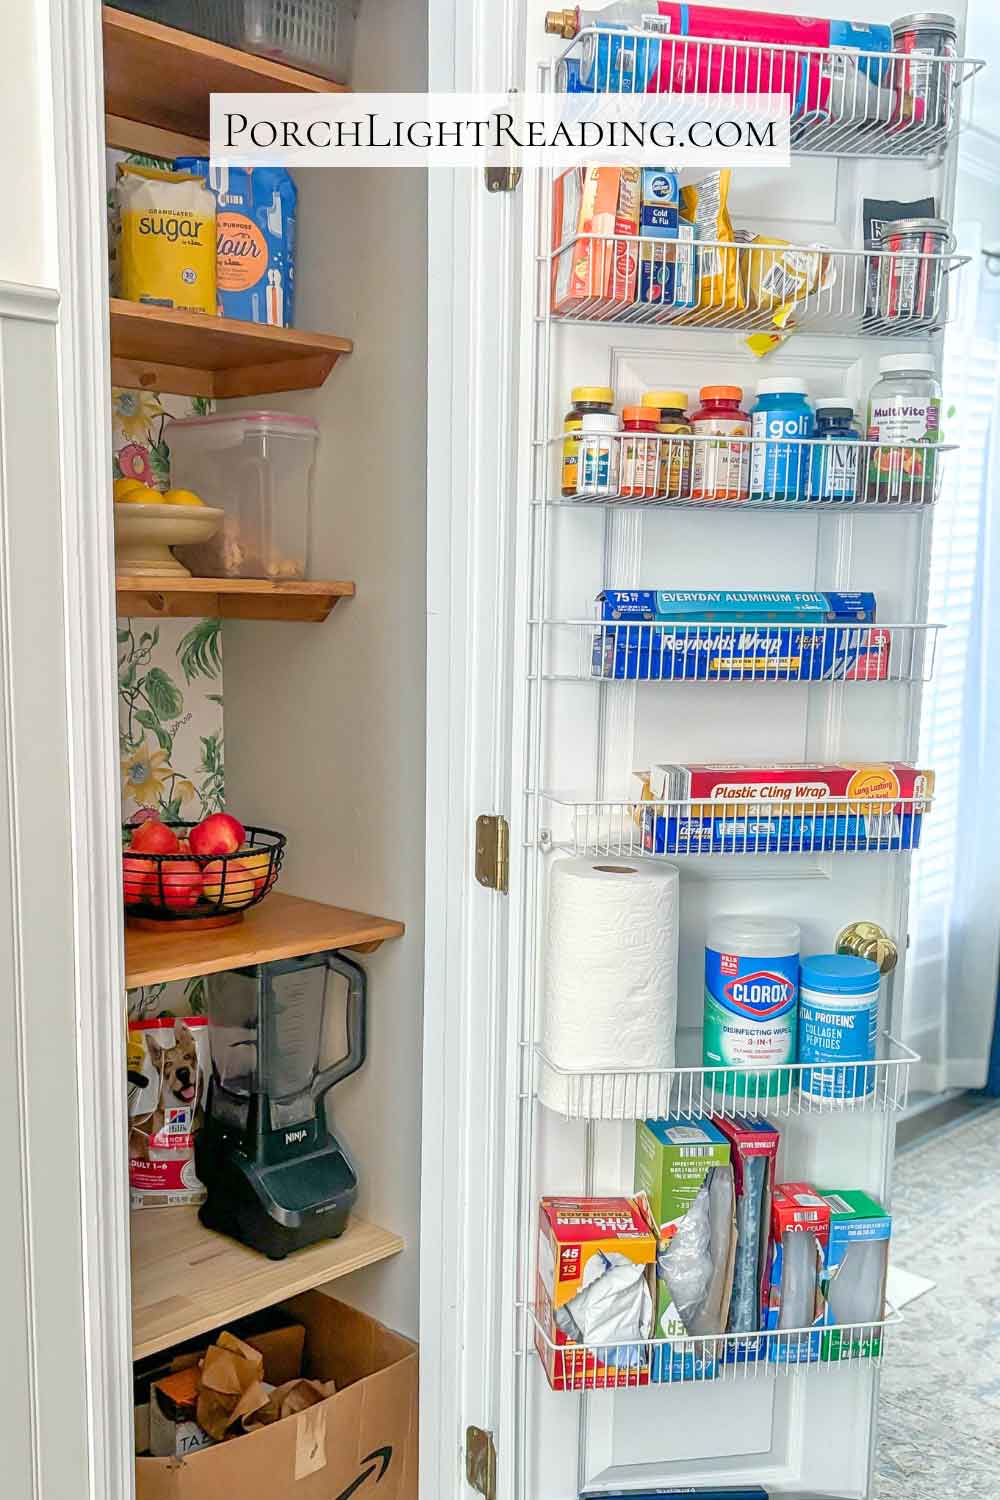
Wire door pantry rack- I really disliked our wire pantry door rack too, but it adds so much more storage! I had a couple of options: Remove it, replace it, or use it.
I decided to use it. It gives us so much more usable space and if I can keep it better organized, then we’re in good shape when it comes to storage. I gave it a good cleaning and reorganized the whole thing to better suit our needs. And guess what. I don’t hate it!
- Over door pantry rack (Amazon)
Lessons Learned From Our Small Pantry Makeover
We had talked about doing this project half heartedly for a little while now, but it always felt messy.
In reality, it actually didn’t take that long! Starting at 8:30am we were able to get everything done in a day with both of us working together to putty, paint, wallpaper, cut, and stain. (Benefits of a small pantry I suppose.)
- Go to the home improvement store with a plan in mind. Include a materials list and measurements.
- Keep your first pantry design simple
- Think about how you want your pantry to function. Food items vs small appliances.
- Adjust the shelving space based on what you actually store.
Frequently Asked Questions
Yes! It’s a simple way to make a pantry more functional and easier to organize.
Just around 10-12 inches works well for most items, but deeper shelves (like 16 inches) are helpful for larger items or appliances at the bottom.
Simple shelving, clear organization, and making the best use of vertical space.
Yes. This project is pretty straightforward and isn’t very complicated. But it does require a basic knowledge of how to safely use a saw and other tools and materials.
For our 29 inch narrow pantry we purchased project wood, stain, stain rags, and brad nails. We used leftover paint from another project, wallpaper from the thrift store, and used tools we already owned. The materials purchased for the size pantry we have cost us $120.
This wasn’t a big or overly complicated project, but it sure made a huge different on how our pantry functions day to day!
Although it may still be small in size, the way that it’s organized and the depth of the shelving has made it feel like we have so much more space than before. And let’s not forget about the cute wallpaper that brings a bit of joy every time I open the pantry door.
So if you have a tiny pantry that isn’t working for you, even a few simple changes like this can make it feel completely new and improved!
You also might like…

Back to Home and Garden
Back to Home Page
Like this small pantry makeover? Save this post to Pinterest for later by clicking the pin below!