

Last Updated on June 4, 2025 by PorchLightReading
Old metal table makeover on a budget with this easy DIY project. Transformation with materials list and helpful painting tips.

Eight years ago I found this metal table at a second hand store not too far from our home. Less than 20 minutes later I was folding down seats and shoving it into the back of my minivan. Are minivan’s cool? Mine isn’t, but they do have quite a bit of space in the back. Space for kids, extra kids, and the best second hand furniture I can find on trash day.
I’m a collector of old things that still have life in them. Hoarder might be a better word for it. Who knows how old this table was when I picked it up for less than $50, but it was really starting to look sad and tired even by my standards.
Some might put in on the curb and another great little minivan would have picked it up, but I couldn’t let it go. It just needed a bit of spray paint and thrift store fabric. An easy makeover on a budget.
Follow us on…

This post may contain affiliate links. As an Amazon associate I earn from qualifying purchases at no additional cost to you.
- Table of contents: Metal Table Makeover On a Budget
- Why you’ll love this DIY project
- Tools and materials list
- Step by step metal table makeover
- How to refinish chair cushions
- Budget friendly makeover tips
- Frequently asked questions
The amount of things I’ve refreshed using spray paint and fabric is getting a little ridiculous. Outdoor umbrellas, mailboxes, screen doors! The list goes on. As long as they continue to make good quality spray paint that sticks to everything, I’ll continue to love my old and faded furniture.

This is our own personal experience. Be sure to seek professional advise and follow manufactures instructions.
Metal Table Makeover On a Budget
This wasn’t my first time making over this table. Oh no, just a few years ago I couldn’t stand looking at the glass top with sticky fingerprints all over it. About 74 times a day I was whipping it off in hopes of keeping it clean for more than 3 minutes. With two small children it never happened but now that I look back on it, it was really a blessing. Toddlers spilling paint, eating snacks, having mid morning tea parties. Laughter and giggles filled the house at any given time.
My solution to this glass table problem was frosting the top with a small design, and I loved the outcome! It hid the fingerprints and solved the sticky table look. Fast forward a few years and instead of fingerprints I had peeling paint and warn cushion fabric.
Why You’ll Love This Project
- Budget friendly- No need to buy new furniture! A little paint and thrift store fabric goes a long way.
- Customizable- Choose a color and fabric to match your style.
- Simple and easy- With a few basic tools and materials, anyone can do this project.
- Eco-friendly- Upcycling old furniture is a great way to keep it out of the landfills.

Tools and Materials List
Since this is a budget friendly makeover my first stop was to the thrift store to look for fabric to refinish the chairs. Lucky for me I found two large pillow shams in a beautiful texture and color! My hopes were to easily slip them over the existing cushions and use a staple gun to attach them underneath.
- Tools
- Sand paper or wire brush
- Screwdriver
- Staple gun
- Scissors
- Materials
- Spray paint + primer (our project took 3 cans of spray paint)
- Fabric (for cushions)
- Drop cloths
- Painters tape
- Clear topcoat (optional)
Tip: You can use a fabric shower curtain, pillow shams, table cloth, or curtain panel for an affordable way to reupholster the chairs.

Step by Step Metal Table Makeover
Prep and clean the table- Remove chair cushions using a screw driver if possible. Set aside and give a deep clean or refresh with new fabric.
Before painting the metal table, the surface needs to be clean and smooth. Start by whipping down the table with warm soapy water and remove any dirt and dust. If the table is rusty or peeling, use sandpaper or a wire brush to remove any loose paint and rust spots. Allow to dry completely before moving to the next step.

Choosing the right paint- For this project we decided to keep it simple by using a paint plus primer spray paint that is formulated for metal surfaces. This allowed us to get an even coverage that was fast drying. Perfect for those of us that are a bit impatient.
Tip: Be sure to use a primer before painting or a spray paint that includes primer and is designed for metal surfaces.
Related Posts:


Add your first layer of spray paint- Shake the can well before starting. Apply a thin coat of paint and allow to dry. Continue with a second and third coat, as needed, allowing each coat to dry in between applications. Be sure to keep the can 8-12 inches away and spray in sweeping motions to avoid drips.
For added protection, consider sealing the table with clear sealant.
Tip: Avoid spray painting on windy days as you won’t get the even coverage you are looking for.

How To Refinish Chair Cushions (Optional)
If your table has chair cushions that can easily be removed, now is a great time to refresh them! Ours was a simple extra step of unscrewing the existing cushions, adding a thrifted fabric, and using a staple gun to secure them in place.
For this project I found an extra large pillow sham in the color olive green. It was just large enough to fit the seat cushion but just barely!
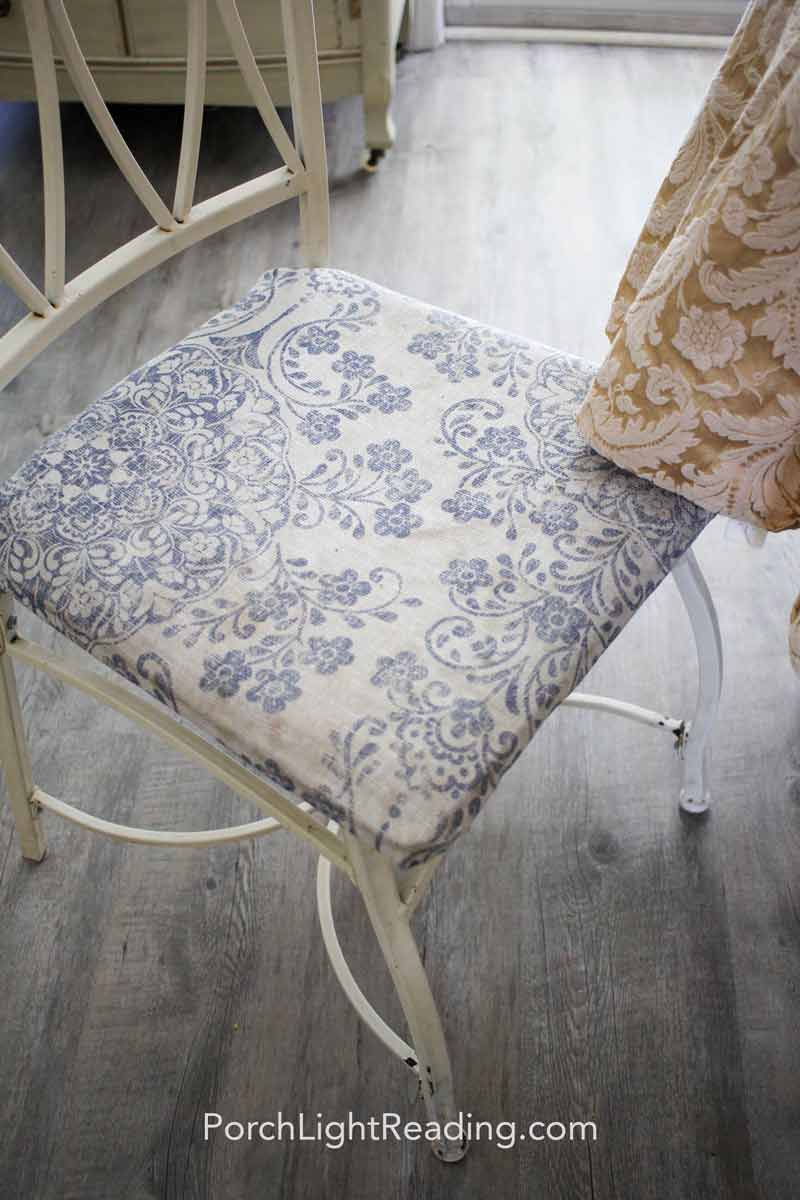
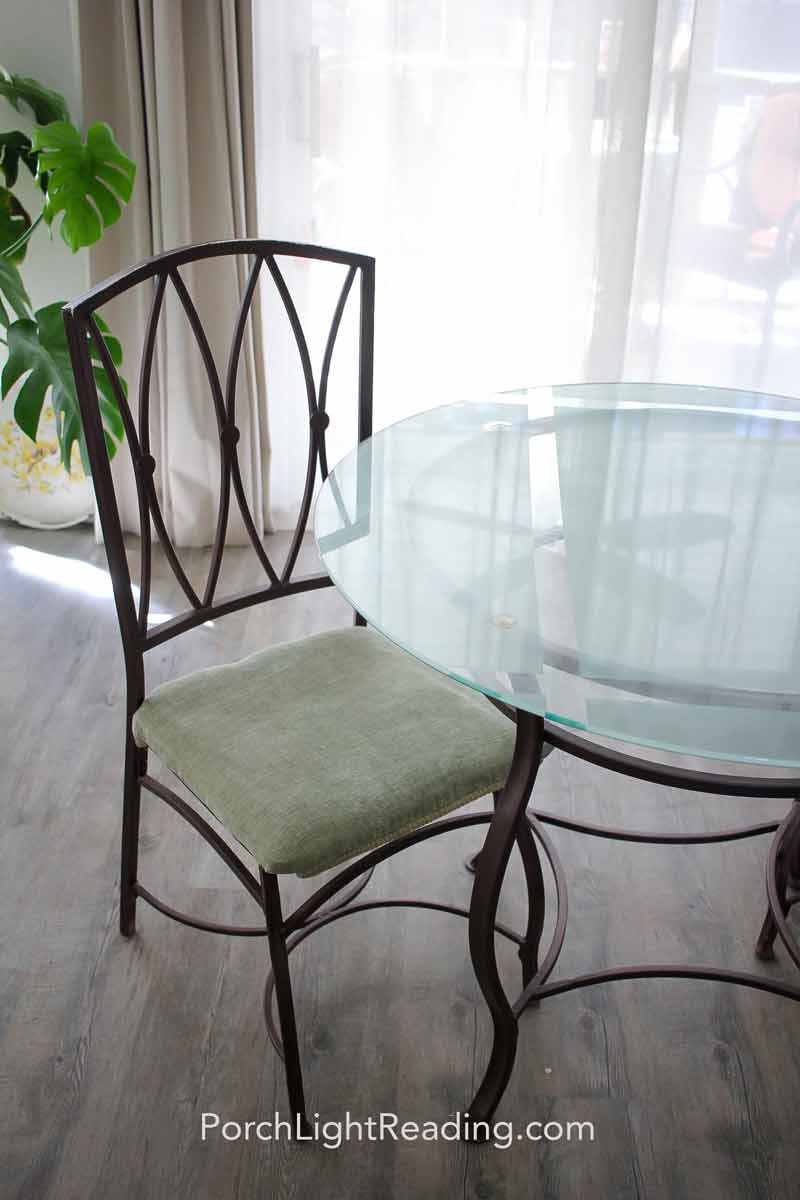
Remove old fabric- Flip the chair over and unscrew the existing seat cushion. (This step should have already been done in the beginning of the project to ensure spray paint didn’t get on the cushions.) Remove old fabric and padding if desired.
Attach new fabric- Measure and cut the new fabric to size, leaving an extra two inch boarder to secure it in place. Lay the fabric flat on the cushion, pull tight and secure it to the underside of the cushion using a staple gun. Trim any excess fabric and reattach the cushion to the chair.
Tip: For extra comfort, add a layer of foam padding under the fabric! Just be sure to give yourself a bit more fabric to secure it around the boarder.
Budget Friendly Makeover Tips
- Shop the thrift store for fabric to makeover your chair cushions.
- Check the clearance shelf for spray paint.
- If your chairs don’t match, paint them the same color for a cohesive look!
- Our project took 3 cans of spray paint but we were painting over a light color to a dark color. Making it more forgiving and simple to paint over.

Frequently Asked Questions
Look for spray or brush on paint labeled “for metal surfaces.” We decided to go with a spray paint designed for metal surfaces to help get into the small cracks that brushes could easily miss.
You’ll want to properly prep the surface before starting. By cleaning and removing rust or chipping paint first, you set yourself up for better wear and tear for the future. You can also seal the table with a clear topcoat for added protection.
Regular paint may not adhere well or be as durable. It’s best to choose the right paint now than having to refinish it later down the road.
Spray paint provides a smooth finish without the brush strokes of a regular brush. It also allows you to get into small areas that brushes might be too big for. Although both methods work, I find spray paint to be easier.
Looking back on this project it was fun to see just how far we’ve come in the a year of living in our new home. The sliding door blinds have been switched out for curtains. Sad looking dressers I found on trash day have been painted a nice, rich, green, and moulding has been added above the doors.

With each small project our house is little by little turning into a home, but it’s not something drastic or done overnight. It’s weekend home improvement store date nights and wondering what paint will look nice with the natural lighting we have now. Spoiler alert- I’m always wrong on the paint. Thank goodness they have those paint chips you can bring home!
Oh, our old metal table makeover came out pretty nice too. We’ll see you on our next project!
You also might like…

Back to Home and Garden
Like this project? Save this post to Pinterest for later by clicking the Pin below! Psst, that really helps us grow as a small business.
