
Last Updated on October 24, 2025 by PorchLightReading
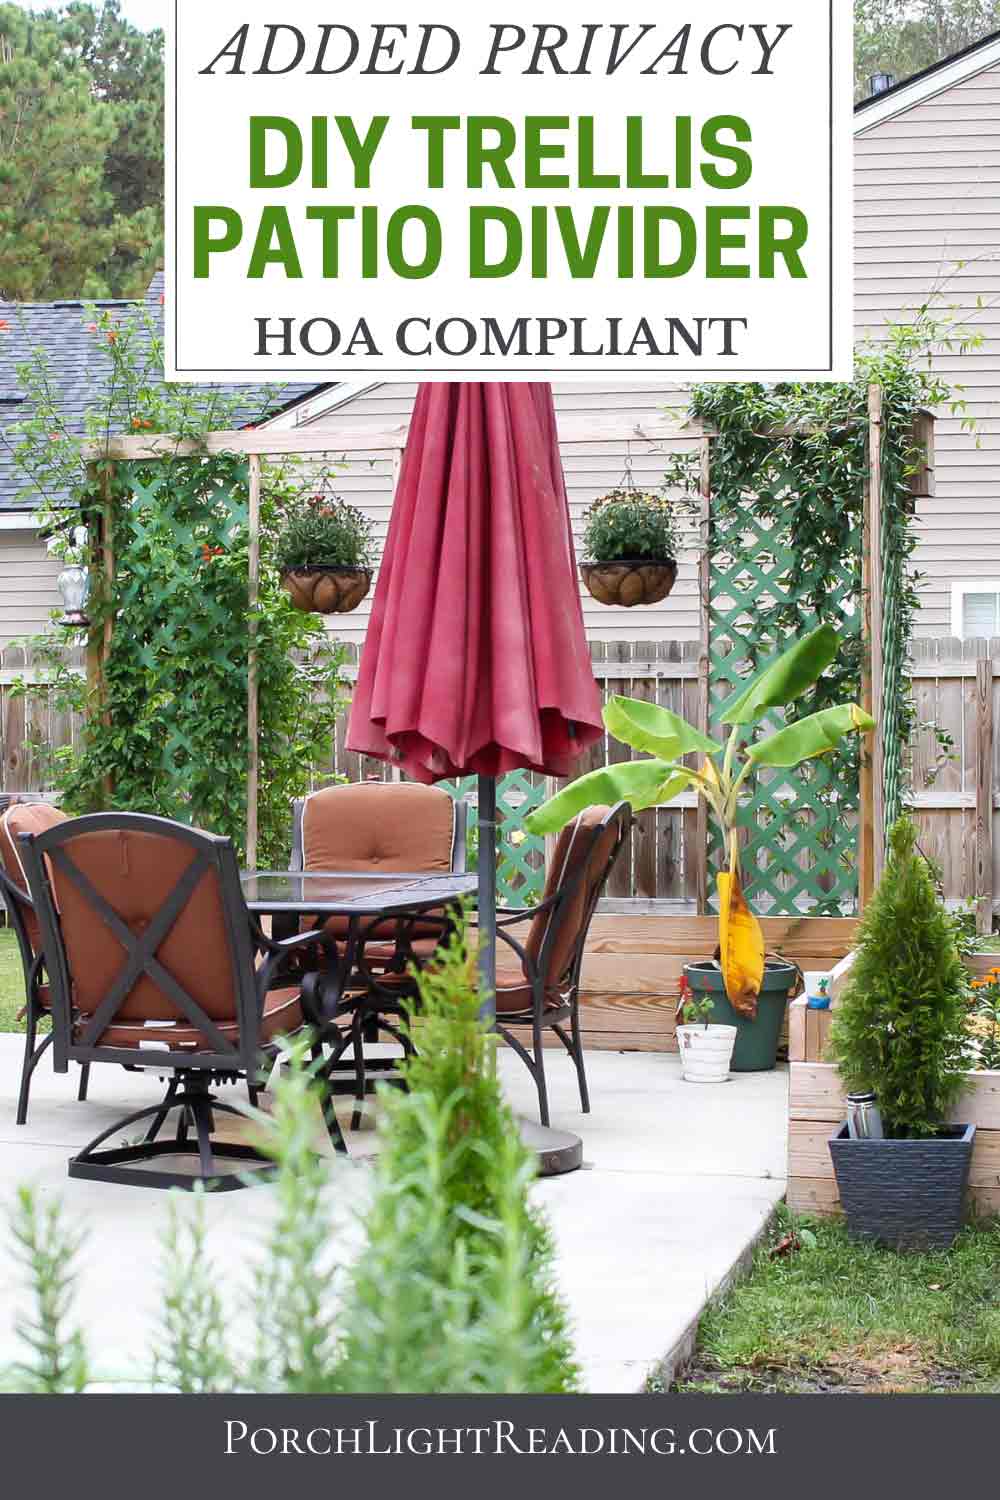
DIY Trellis privacy screen with raised garden bed patio divider. Frame your patio with something that is both stylish and functional.
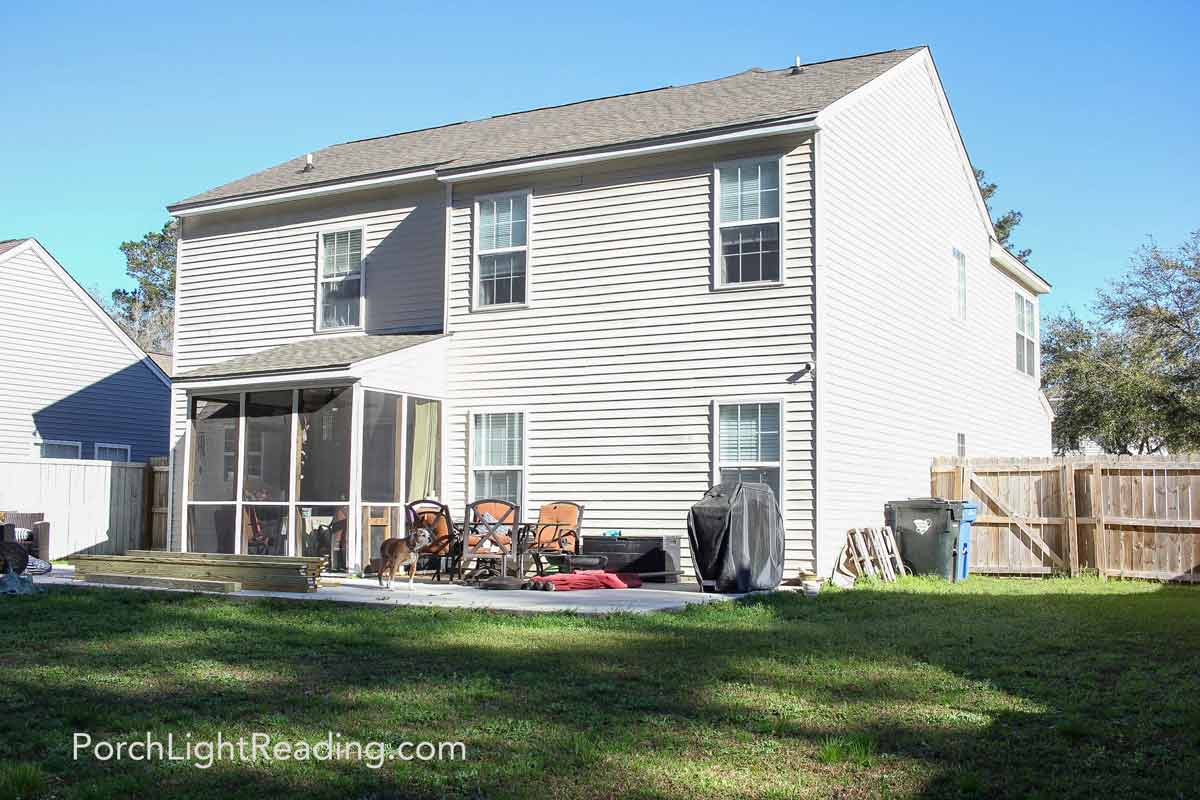
Our new backyard was a blank slate and as exciting as that can be, it can also be a bit overwhelming when you need to DIY on a budget. We’re no strangers to home improvement projects, but this time, in this new house, we had to keep within the rules of the HOA.
Never did we think we would live in an HOA but here we are. Close to the school system we wanted and within a reasonable commute to work. So we read the HOA rules and found a way to add a bit of privacy and character to our backyard without having to ask permission and get permits.
Follow us on…

This post may contain affiliate links as an Amazon associate I earn from qualifying purchases at no additional cost to you.
- Table of contents: Trellis privacy screen with raised garden bed patio divider
- Materials list and tools
- Frame for the raised garden bed
- DIY Trellis privacy screen
- Raised garden bed and tips
- Trellis privacy screen vs pergola
- Before and after photos
DIY Trellis Privacy Screen with Raised Garden Bed Patio Divider
Now when it comes to being HOA compliant I’m not looking to bend the rules or even skirt around them. We simply read what was allowed and what was not. Building a garden was allowed. Building a pergola was allowed with permission and permits.
Several years ago we built a beautiful pergola at our home in Arkansas (no HOA) and I loved that DIY project every single day! We planted a wisteria vine to climb up to the rafters and each spring it would bloom with so many gorgeous cascading purple flowers. Movie nights under the stars, family dinners, and backyard BBQ’s. It was a great place to make lasting memories with our young children and a time we all think back on fondly.
But work brought us to a new location and here we are with a new outdoor DIY project.

This is our own personal experience. Be sure to seek professional advice. Always practice tool safety and follow manufacture instructions.
Materials List and Tools
- Materials we used to make one large L-shapped garden bed with 4 trellis privacy screens.
- 3- 4″x4″x8′ pressure treated
- 8- 2″x2″x8′ pressure treated
- 8- 2″x6″x10′ pressure treated
- 7- 2″x6″x12′ pressure treated
- 2- 2″x4″x10′ pressure treated
- 4- 8 foot lattice
- 3 inch galvanized deck screws
- Paint / paint brush or roller
- Tools we used
- Circular saw
- Impact driver
- Measuring tape and pencil
- Level
- Speed square
- Rubber mallet
- Sawhorse
- Clamps
- Shovel
- Safety glasses
*Note- Todays pressure treated wood is considered safe for raised garden beds as the chemicals to treat the wood has changed over the years. However, cedar is a great option and naturally rot resistant.
Build The Frame To Garden Bed
For this project we are framing our concrete patio with the raised garden bed. It’s a pretty straight forward project but one that will give us added greenery and privacy from the neighbors.
It’s a mirrored garden bed from our most recent outdoor project on the other side of the patio and will allow for a dedicated seating area and several walkways.
Choose the location- Since we are framing the patio, and mirroring the planters on the other side, this location was already picked for us. But, generally, while picking a location you want to choose a level spot that gets at least 6-8 hours of sunlight. You’ll also want to make sure that this location drains well and won’t get waterlogged.
- Level location
- At least 6-8 hours of sunlight for the garden
- Location drains well/won’t get waterlogged
Prepare the site- If your yard isn’t perfectly level, grab a shovel and smooth out the area before building. Prep the area by removing roots, rocks, ect.
Cut the boards to size- Measure twice, cut once. Using a measuring tape and speed square, mark and cut the boards to their appropriate lengths.
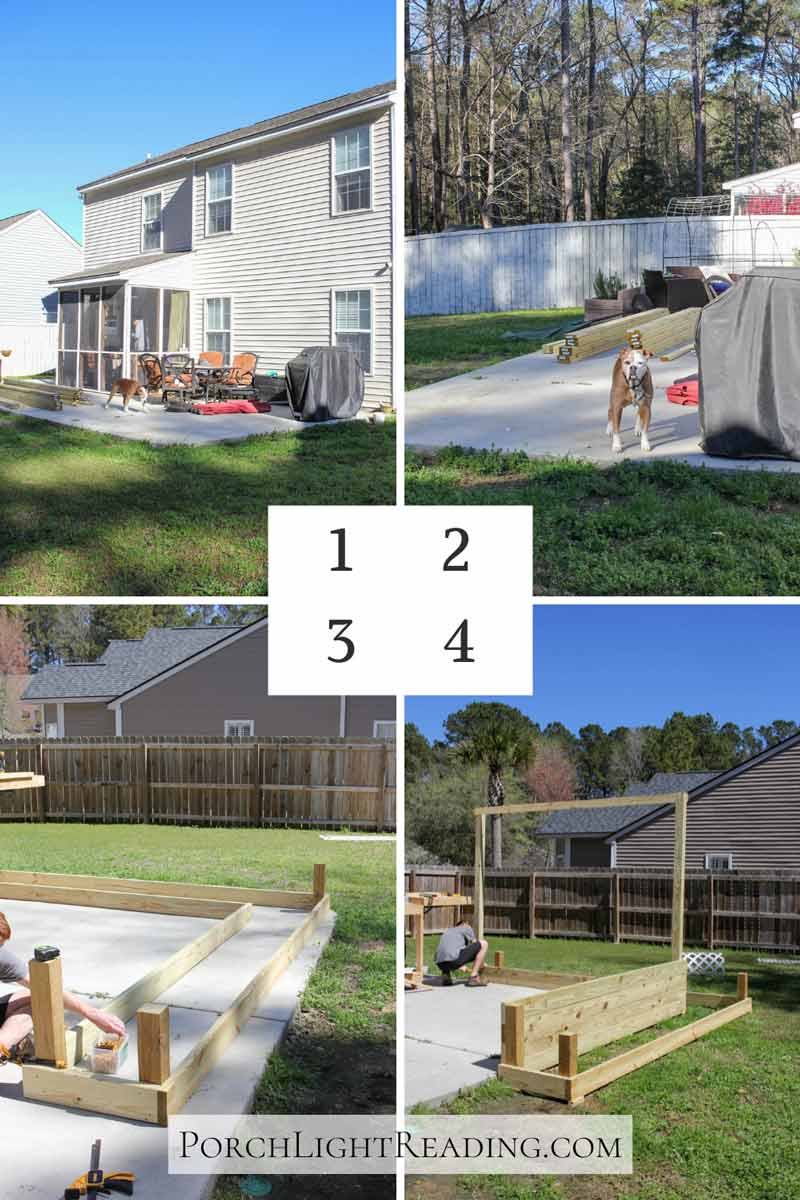
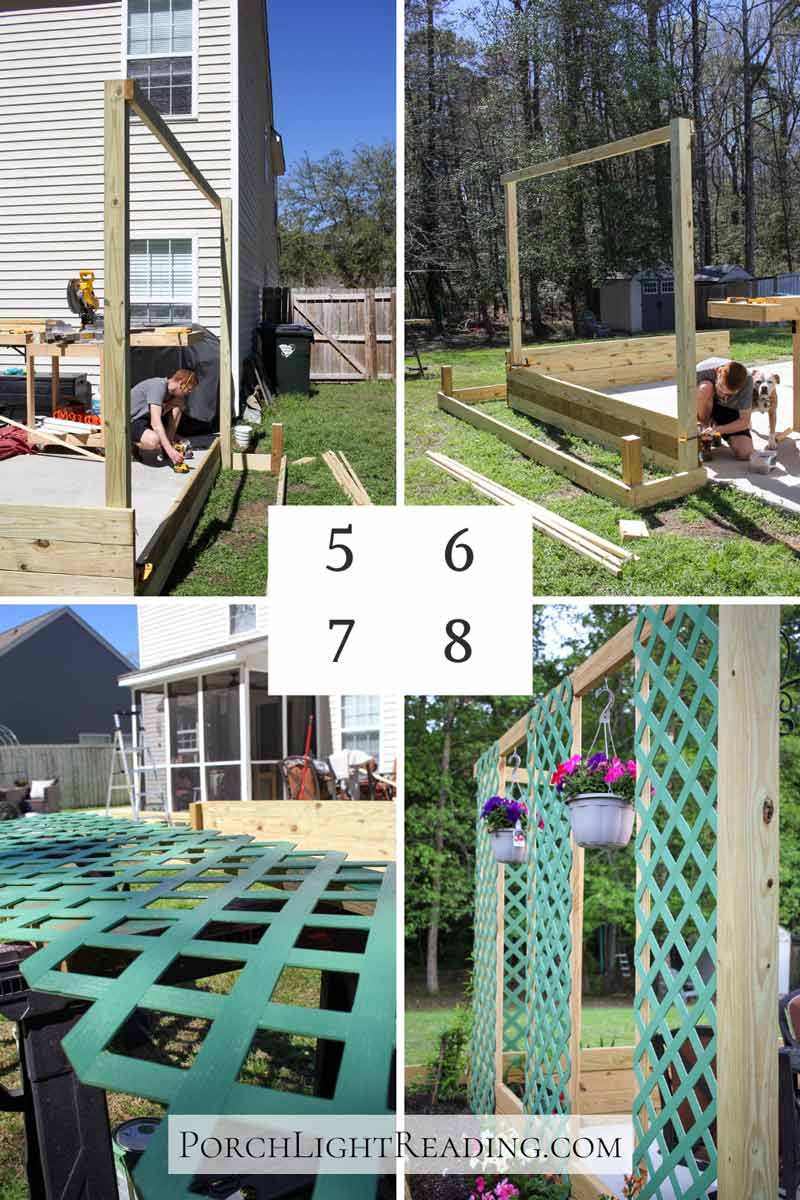
Assemble the frame- Position the boards to form rectangles and secured them into place at the corners by using 3 inch deck screws. Use a frame square to check that the corners are aligned properly.
Add corner and side stakes- We then added stakes at the corners and middle for added stability. Cut 2″x4″ stakes and drive them into the ground around each corner and along the longer sides to prevent bowing under soil pressure.
For this step we used 4″x4″s at each corner and addition 2″x4″ supports along the middle of the garden. Two of our 4″x4″s were left at the 8 foot hight to later attach our trellis.
Related Posts:


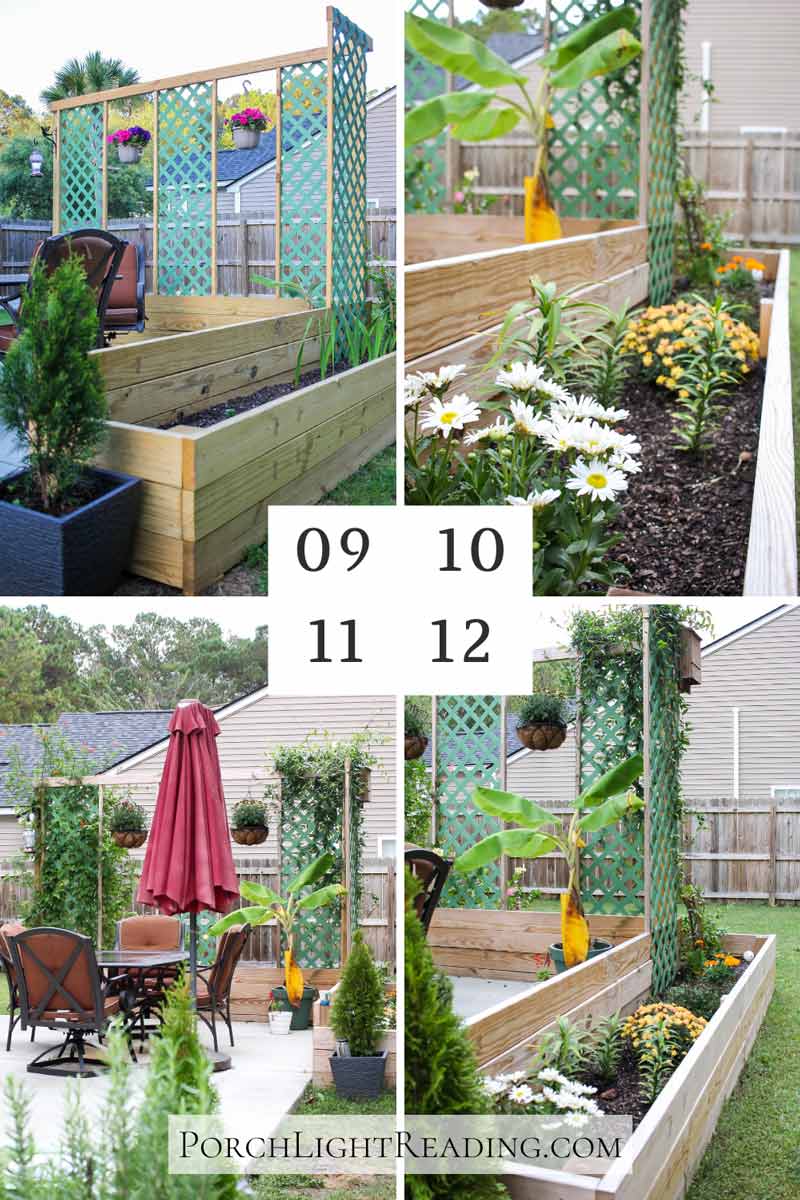
Add the second layer of boards- Stack and secure the next layer of boards, aligning and fastening them with screws. Repeat until you reach the hight you’re looking for. For this project we mirrored the other side of our patio by going up three levels and a forth level along the back as a decorative patio divider.
DIY Trellis Privacy Screen
We could have finished here and just used the raised garden, but we also wanted a little privacy from the neighbors. Adding a DIY trellis privacy screen would give us added greenery and a nicer view than looking at the side of their house.
I know, just plant some trees right? Wrong… you need to ask permission from the HOA to plant trees. Silly I know. But garden shrubs and bushes in the backyard are ok! So on to our next steps.
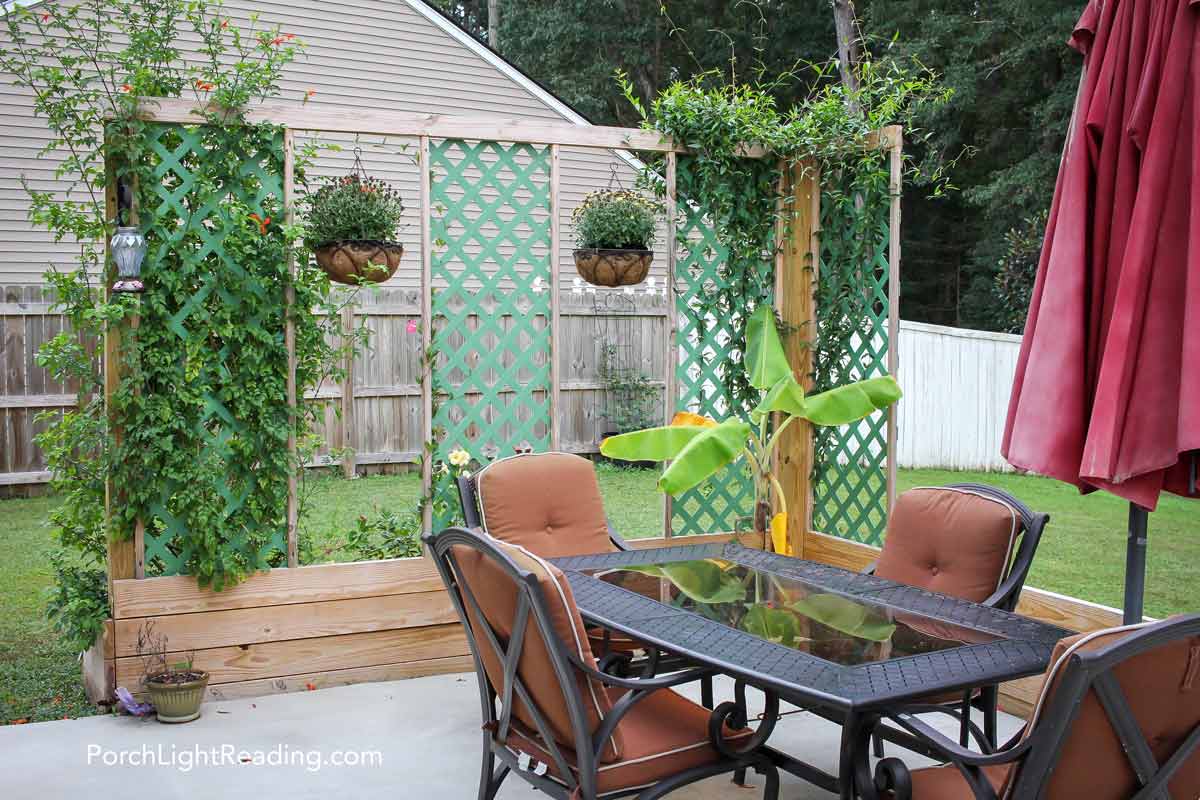
Prepare the trellis- We decided to keep it easy and use a lattice from the home improvement store. But instead of the bright white, we wanted it to blend and look more natural. So I painted the lattice a natural green color.
This particular lattice had a bit of texture to it, allowing us to paint directly on it with a paint and primer mix. However, you may want to paint or spray paint a primer for your own lattice so that the paint can stick properly.
Build the trellis frame- While the paint was drying we moved on to our next steps. Attach the top 2″x4″x10′ to the top of the 4″x4″ posts. Measure where each trellis will go and be sure to mark the center for the middle trellis.
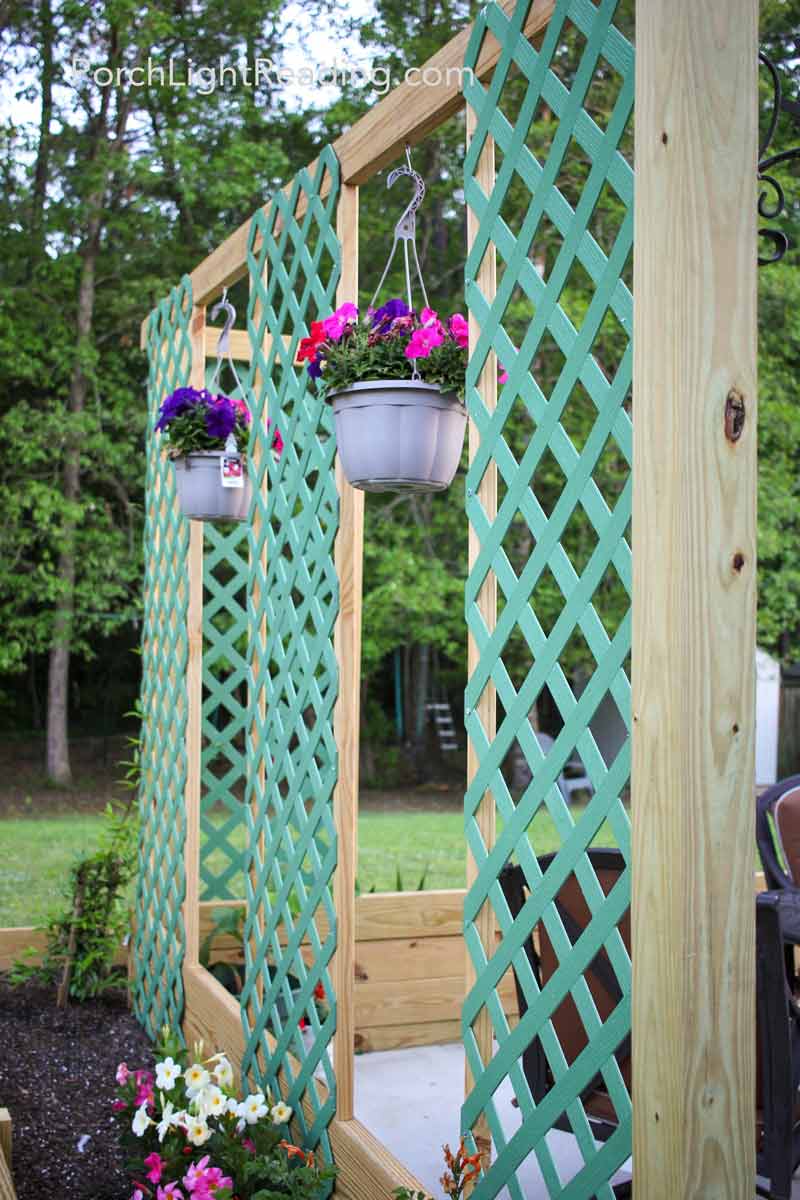
Attach the lattice- Once dry, start at the ends and secure the 2×2’s and lattice to the 4×4 posts and top 2×4, using shorter exterior screws or staple gun for the lattice. Frame the lattice on each side using the 2×2’s. Continue with the center trellis. We then added another two feet for the top corner trellis and secured it with the last 2×2.
*Note- We trimmed the 2×2’s and used pocket screws so that they would fix snuggly into the top and bottom boards. This gave us a more finished look since it fits flush and isn’t raised out on either side of the raised garden bed.
Filling The Raised Garden Bed
Now that the frame and trellis is all situated we can continue with the fun part! Gardening.
Since we built this raised garden bed 3 boards high, we have a lot of fill dirt we need to provide! To be fair, most raised garden beds are only two boards high. We decided to go with 3 six inch boards on the front, 4 on the back, since this is also a patio divider and statement feature. But with that comes a lot of dirt.
To help fill these large garden beds we used debris to fill the bottom and help give us a head start. Cardboard for the bottom then leaves, sticks, pine needles, anything we could rake up and give us a bit of a boost before having to buy a crazy amount of dirt.

Fill and plant- To help fill your raised garden bed you can use natural debris such as sticks, pine needles and leaves. Fill the remainder with high quality soil and compost mix.
Tip- Use cardboard on the bottom to act as a weed barrier!
Trellis Privacy Screen Vs. Pergola
Oh how I wanted another pergola! But we had a few things working against us. The first one was we needed to stay within the HOA guidelines and we didn’t want to draw this out by getting designs approved and permits.
We also didn’t want to block natural light in our living room and that’s exactly what a pergola would do. Block our natural light and view of the wooded area behind our house. So we decided to compromise with a raised garden bed and trellis privacy screen.
It gives us the separation we were looking for, along with added greenery and functionality. It works as a privacy screen, patio divider, and garden!
- Trellis Privacy Screen
- HOA compliant
- Privacy screen from neighbors
- Patio divider to section off our dinning area
- Garden for seasonal plants and tall bushes
- Doubles as vertical garden
- Allows for natural light to come through the windows without being darkened by a pergola
- View of trees and wooded area
Before and After Photos
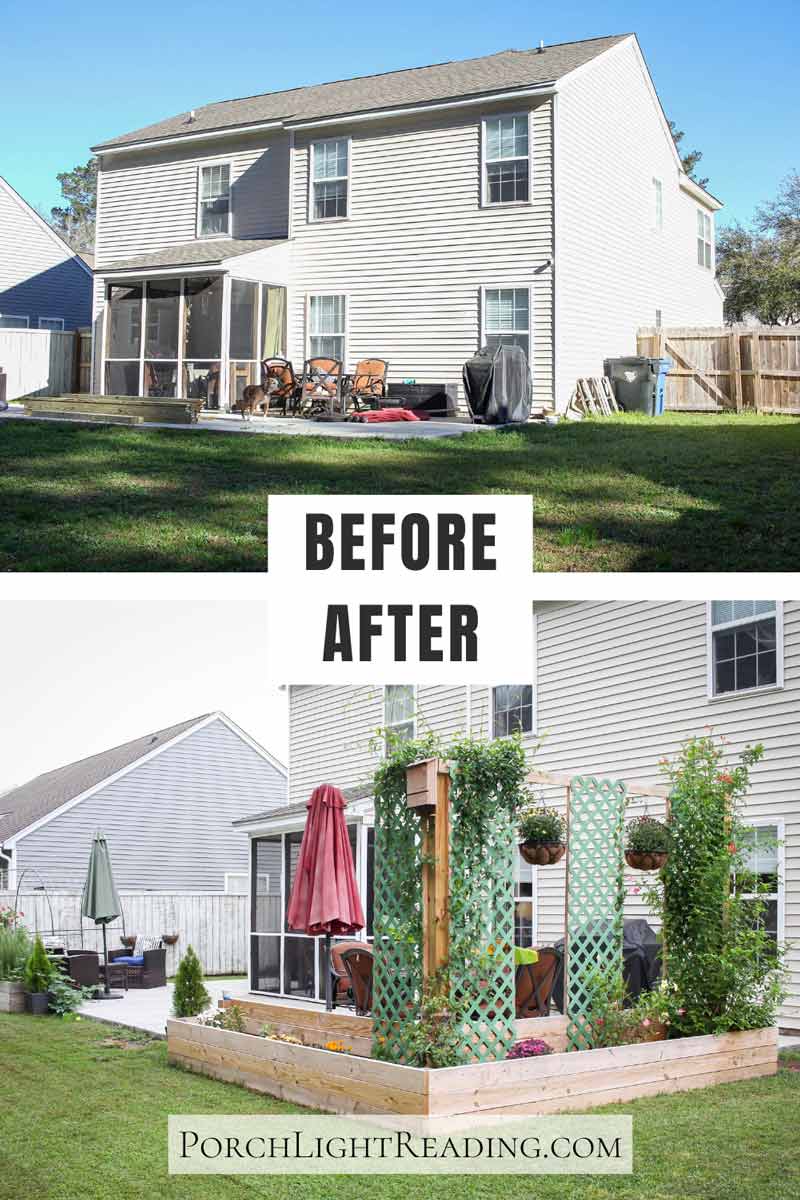
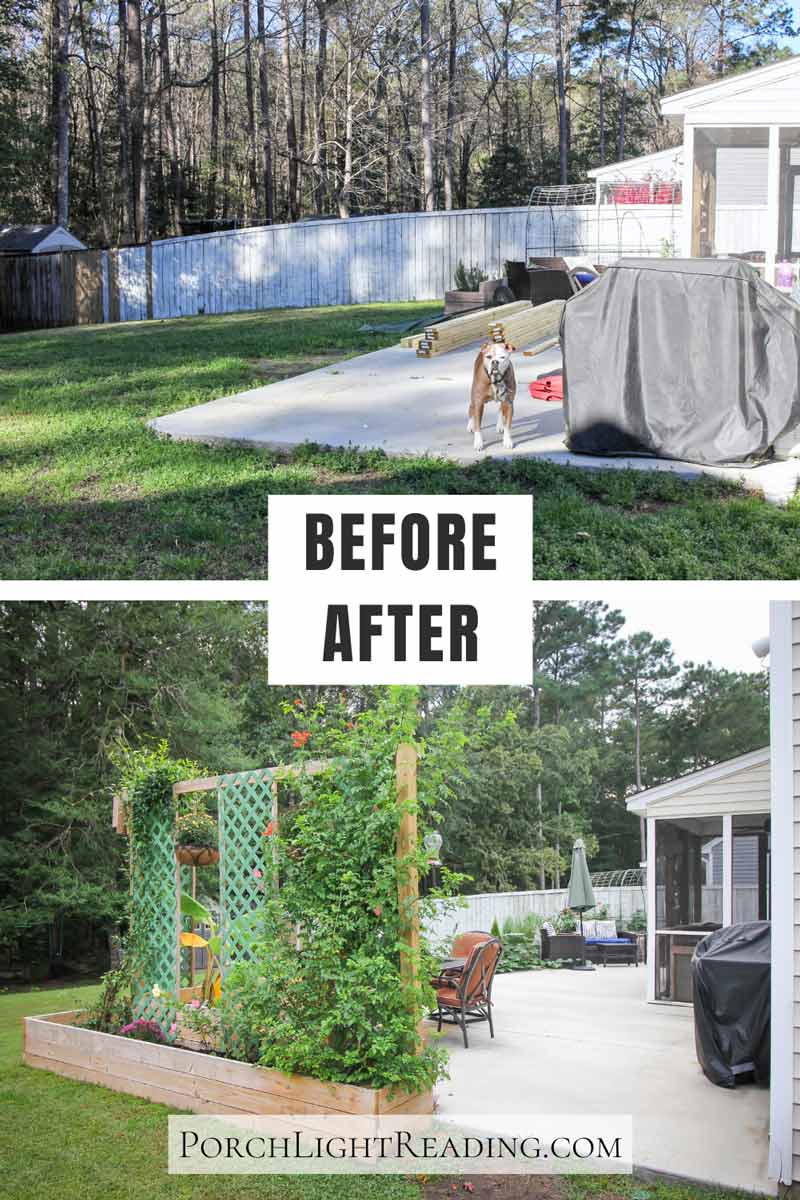
This weekend DIY project was exactly what this patio needed! It’s HOA-friendly and is the perfect way to use this space in a few different ways.
The patio divider gives us clear paths to travel and the dinning table a more permanent spot, the garden allows us to grow our own vegetables, and the trellis is filled with lush vines climbing to the top!
Although I still do love pergolas, this alternative gives us the character and functionality we so desperately needed! And just like that, one DIY project at a time, we are turning this house into our home. We’ll see you on our next project.
You also might like…

Back to Home and Garden
Back to Home Page
Like this idea? Save this post to Pinterest for later by clicking the Pin below!