
Last Updated on April 14, 2026 by PorchLightReading
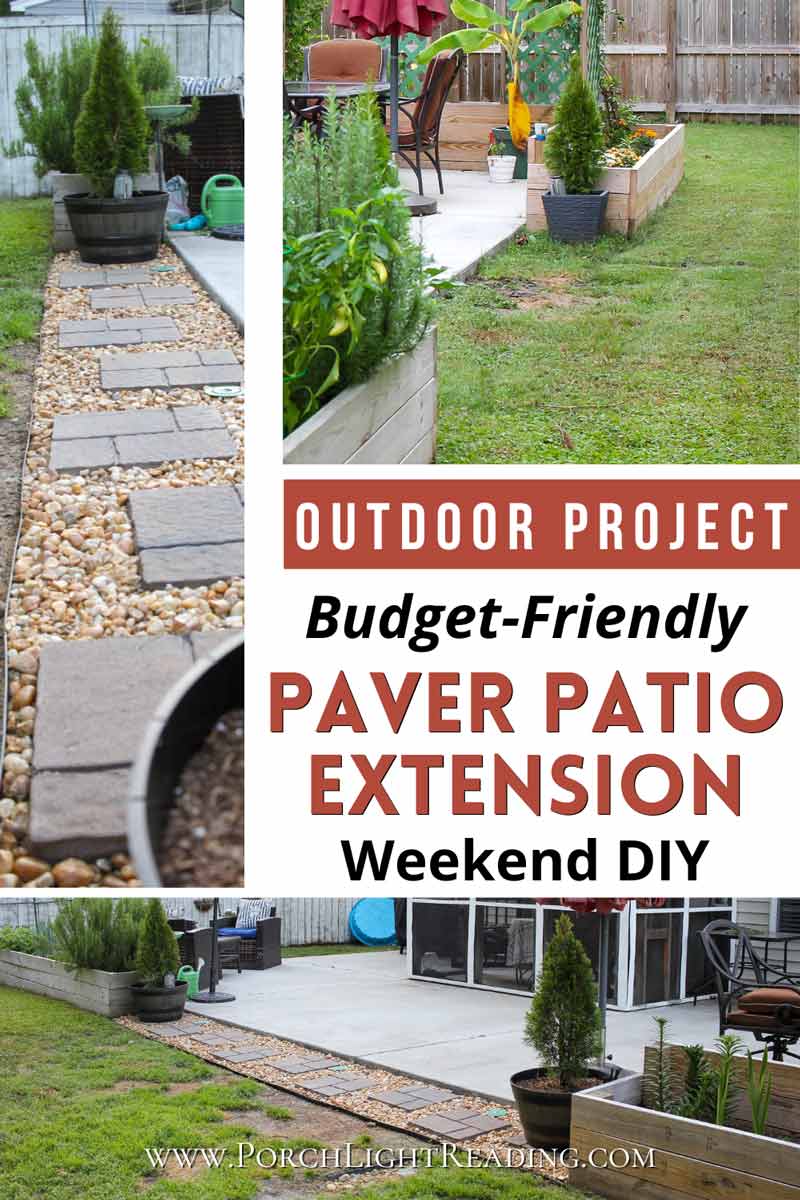
DIY Patio extension with pavers, rocks, and edging. Budget friendly fix to a muddy backyard. Including beginner tips, materials list, and the real cost behind the project.
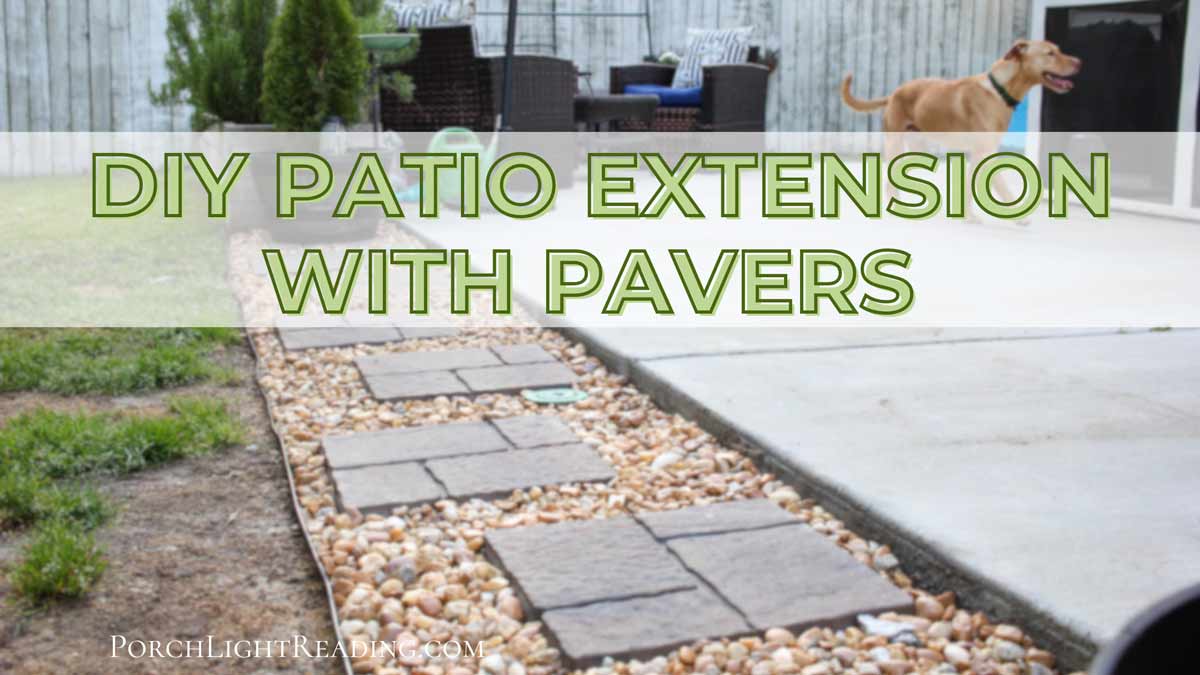
Oh how I love the patio in our backyard! We’ve turned it into quite the little nook filled with yard sale furniture and other side of the road finds.
But wouldn’t you know that this concrete patio has the AC drain running under it and the tube pops up about 2 feet from the patio with nowhere to properly drain, leading to a lot of mud from kids, pets, and grass that couldn’t grow.
Follow us on…

This post may contain affiliate links. As an Amazon associate I earn from qualifying purchases at no additional cost to you.
- Table of content: Easy DIY patio extension with pavers
- How it started (Story time)
- Paver extension materials list
- How to extend a concrete patio with pavers (Step-by-Step)
- Total cost breakdown
- Helpful tips for beginners
- Mulch vs rock landscaping
- Landscape fabric vs paver base foam panels
- Encountering termite bait traps
- Frequently asked questions
- High performance mulch glue for rocks
Easy DIY Patio Extension with Pavers
Right off the concrete slab, things would get muddy fast, especially after a rainy day or two. Of course, we didn’t need a full patio renovation, just a simple solution to make this space more usable and an easier way to step off the patio without having to jump over the mud!
Story Time
So we did what (almost) anyone would do, asked a computer to design it. My husband snapped a quick picture and asked the overly intelligent computer to come up with a plan. And plan it came up with.
- A computer generated design
- A beautiful half circle coming off about 6 feet with pavers, bricks, stones, and extra greenery.
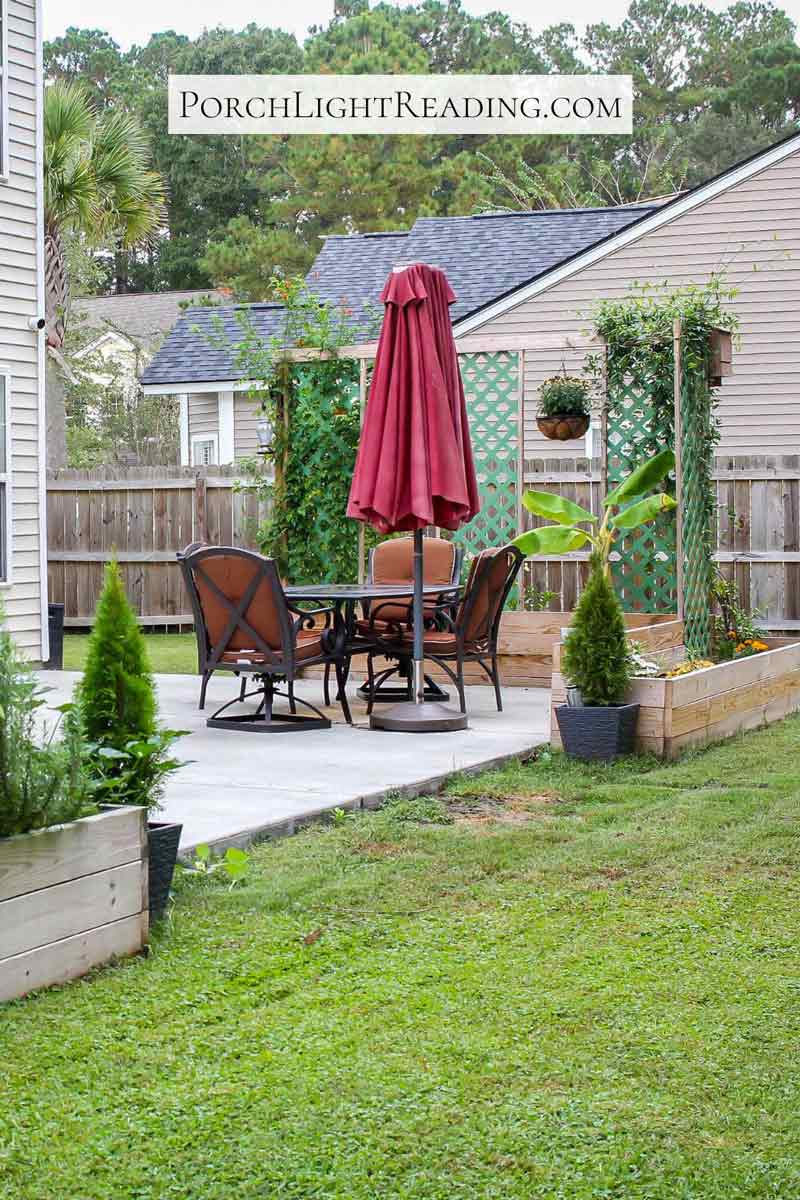
Well that’s not what I had in mind. I figured we would just make a straight paver extension to fit flush with our raised garden beds? It would be beginner and budget friendly with minimal leveling and work. But it was already in his mind, so I went with the flow.
At the home improvement store we started stacking pavers, getting leveling sand, landscape fabric and everything else we needed. Once the flat cart was full and we still needed more, I looked at him and said “this simple project is going to take weeks and almost $800.”
A bit deflated we put it back and grabbed 9 paver blocks, edging, and some leveling sand.
- Why we needed a small patio extension
- Mud from our AC drain was pooling
- Having to jump over the muddy area to get to the yard
- Pets and kids were tracking in the mud
- To keep is simple and affordable
Paver Extension Materials List
This DIY patio extension with pavers went from simple to complicated real quick, but we rained it back in and focused on what we really needed to accomplish given our time, needs, and budget.
Be sure to measure for your own paver extension and always use tool safety and follow manufacture instructions. This is our own personal experience.
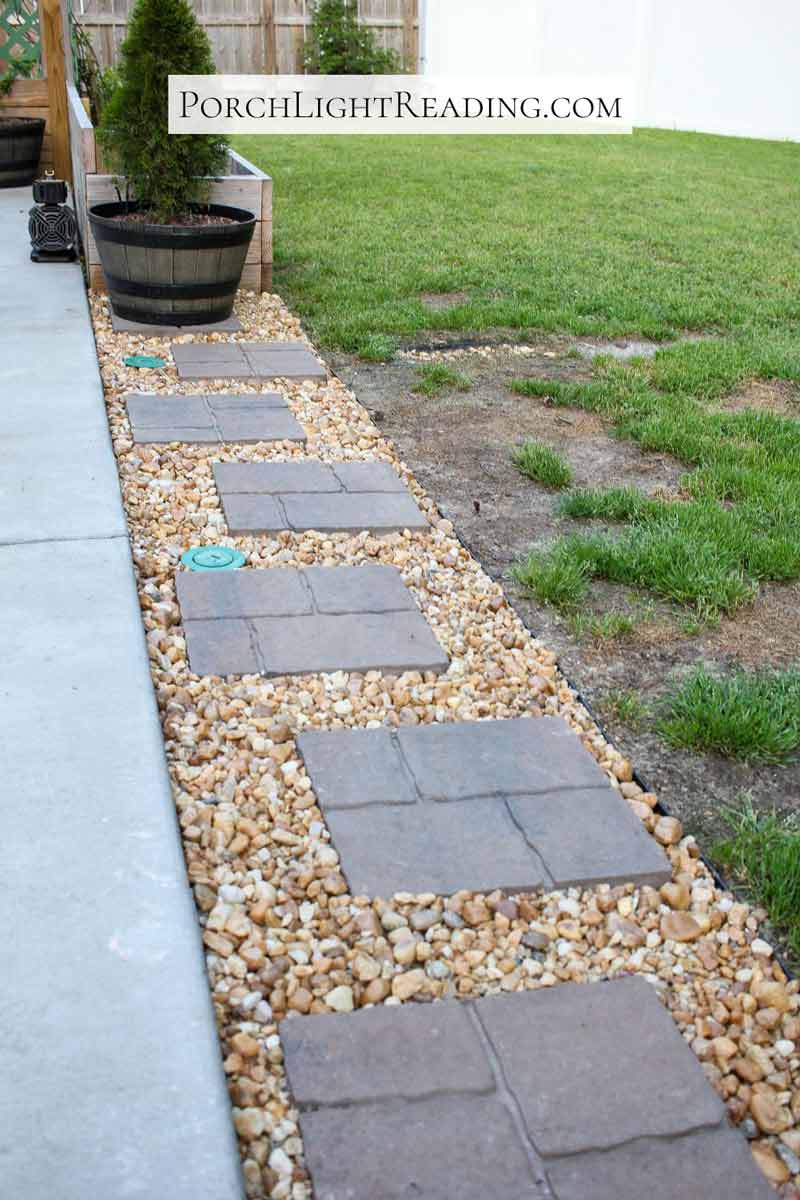
- Materials list to cover 16 feet of mostly level area
- 9 pavers
- 8 bags of paver base sand
- No dig landscape edging
- Landscape fabric or foam boards
- Rocks or mulch
- High performance mulch glue
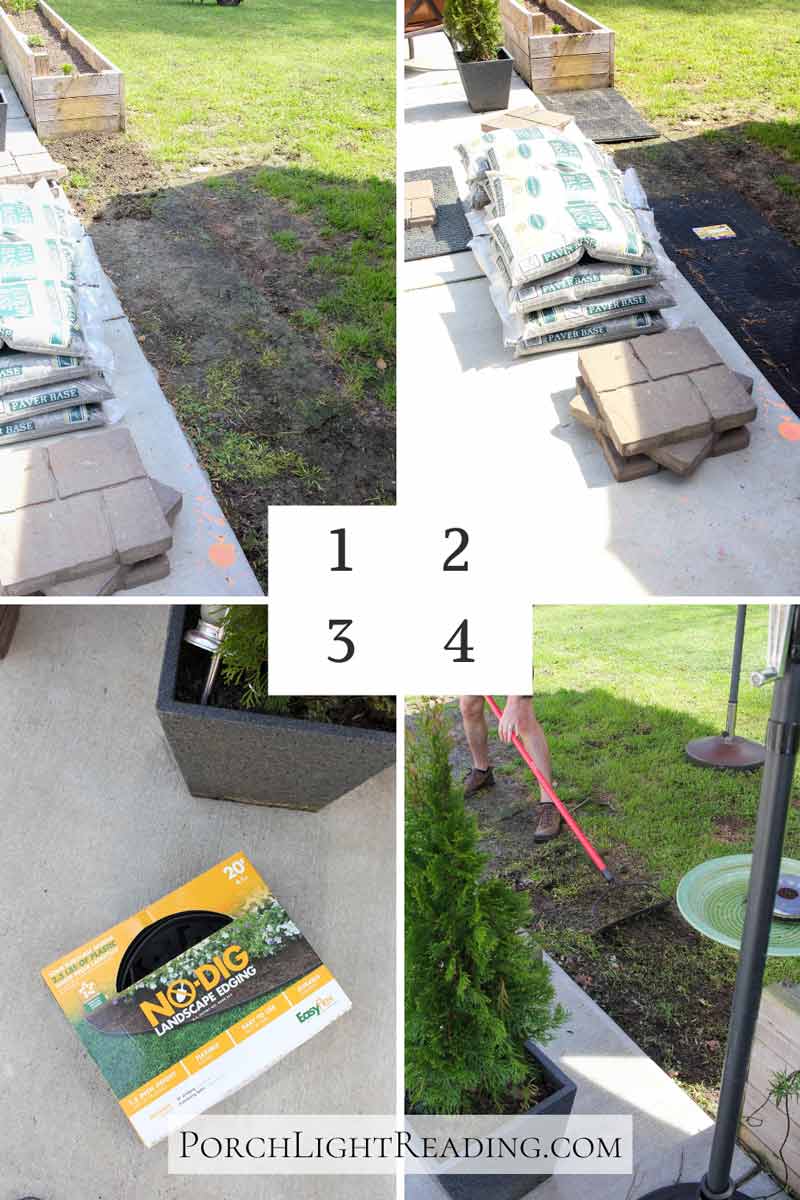
How To Extend a Concrete Patio with Pavers (Step-by-Step)
Clear and level the area- Start by clearing the area using a rake. Loosen the dirt and make sure all weeds, sticks, and rocks are taken out.
Add foam boards or landscape fabric- Once the area is cleaned up, you’ll want to add landscape fabric or paver foam boards to hinder weeds from being able to grow and to have proper drainage.
Add landscape edging- Add boarder trim to keep everything in it’s place. Although you may thing you only need a few steaks to set it in place, we found you really needed a few more to keep it down to not be pushed forward by the sand, rocks, and small movements.
Note- Make sure the landscape edging it taller than the leveling sand and pavers combined.
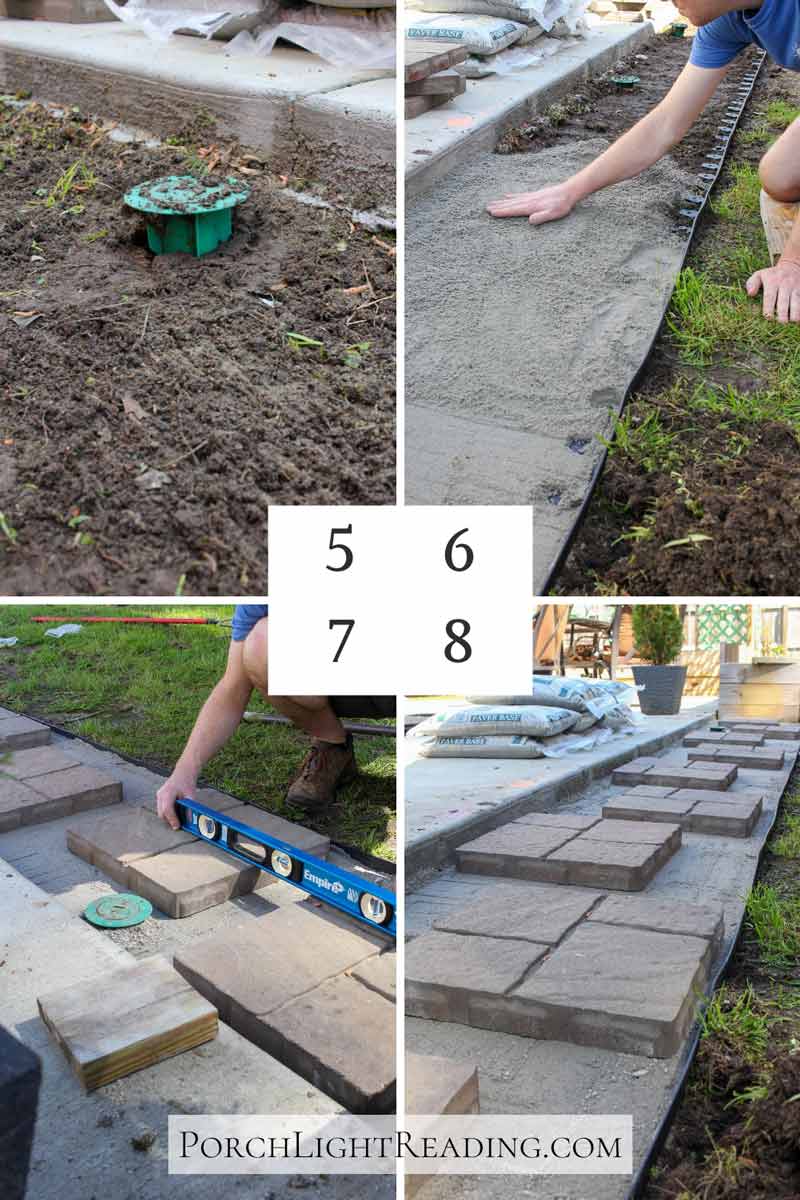
Add and level sand- Add leveling sand and use a scrap piece of 2×4 to level it out and make it compact.
Be sure to only add what you need and not make it too high. You still need to account for the inch high pavers and rocks. We’re looking to make this extension just below the concrete slab and each material does add a few inches.
Place the pavers- Do the math. You don’t want to guess where these pavers will go, you want to know. To do that accurately you need to figure out the spacing between each pavers.
For our 16 foot space with the type of pavers we have, we spaced them out about 7-8 inches on either side, (to adjust for our termite bait traps.)
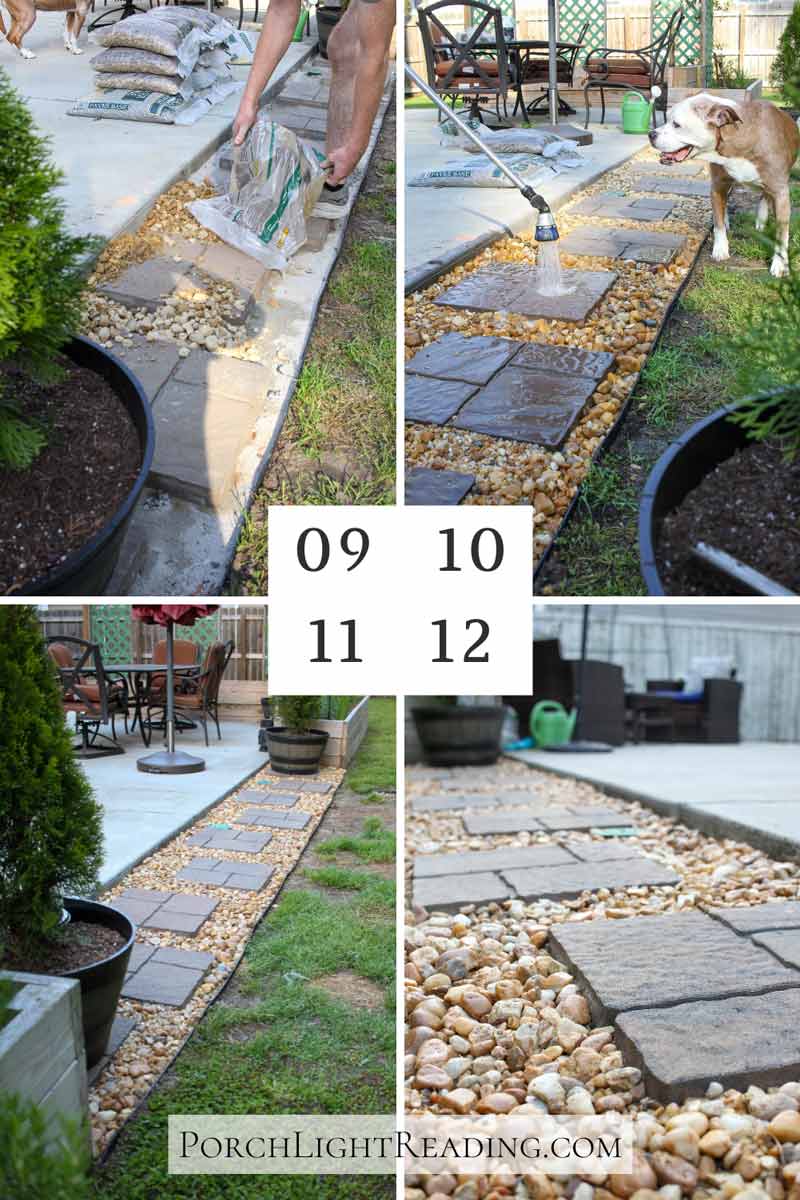
Make sure they are level- Make sure they are level by using a level on one paver and extending it to the one next to it. Continue in this way until all pavers are level, adding sand when needed.
Fill with mulch or rocks- Once everything is adjusted and level, fill with much or appropriately sized rocks. To lock everything in place I highly suggest looking into a high-preforming mulch glue since it’s such a high traffic area.
Total Cost Breakdown (Budget-Friendly Patio Idea)
If you read the story above then you know that we had grand plans! The half circle patio extension with pavers, rocks, and greenery would have been beautiful, but it was exactly that. A grand. Or almost once we had finished it.
Instead we decided to keep it simple to our needs and DIY abilities for our time and budget.
- Paver patio cost
- 16 feet across 2 feet wide
- 9 pavers- at $6 each ($54)
- 20 feet of no dig edging $20
- 8 bags of paver base sand $5.50 each ($44)
- 9 bags of pond pebble rocks $8 each ($72)
- High performance mulch glue $45
This project cost us right around $235 (without tax) and that’s with skipping a few key things like landscape fabric. Although you might be able to get pavers for $6, each material on the list really adds up!
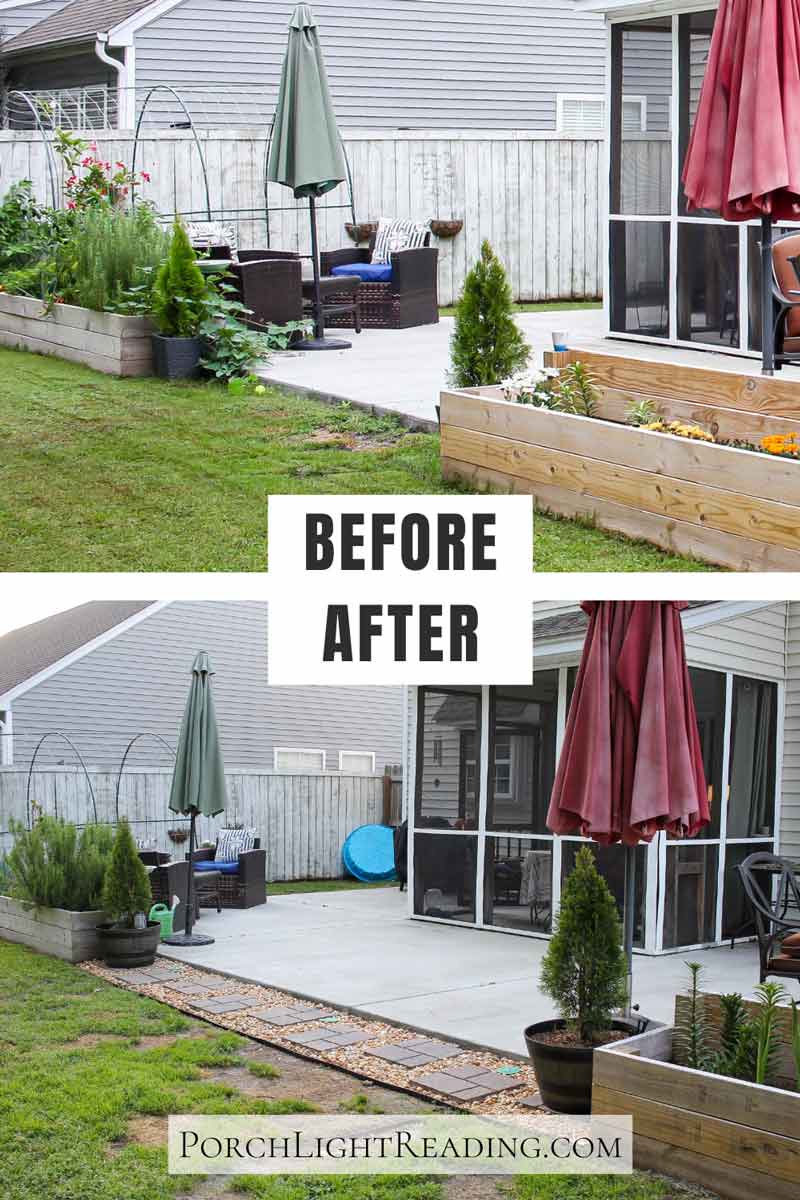
Why we skipped landscape fabric- Truth be told we took a couple of trips back and forth to the home improvement store. In the end we decided to skip the landscape fabric because we were unable to get grass to grow in the area because of the poor drainage.
Since it’s such a small area we decided that any weeds that pop up can either be sprayed or pulled. Although I would recommend you do what’s right for you.
Helpful Tips For Beginners
- Start small. It may not look like a lot of work, but if you’re new to it this project does take time a patience.
- Don’t aim for perfect, aim for functional.
- Look around the storage shed and use what you have. Maybe you have edging hiding in there.
- Although it’s best to do the math to space the pavers evenly, you can use chalk on the patio to get a general idea and space them by eye.
- Don’t forget to plan for drainage
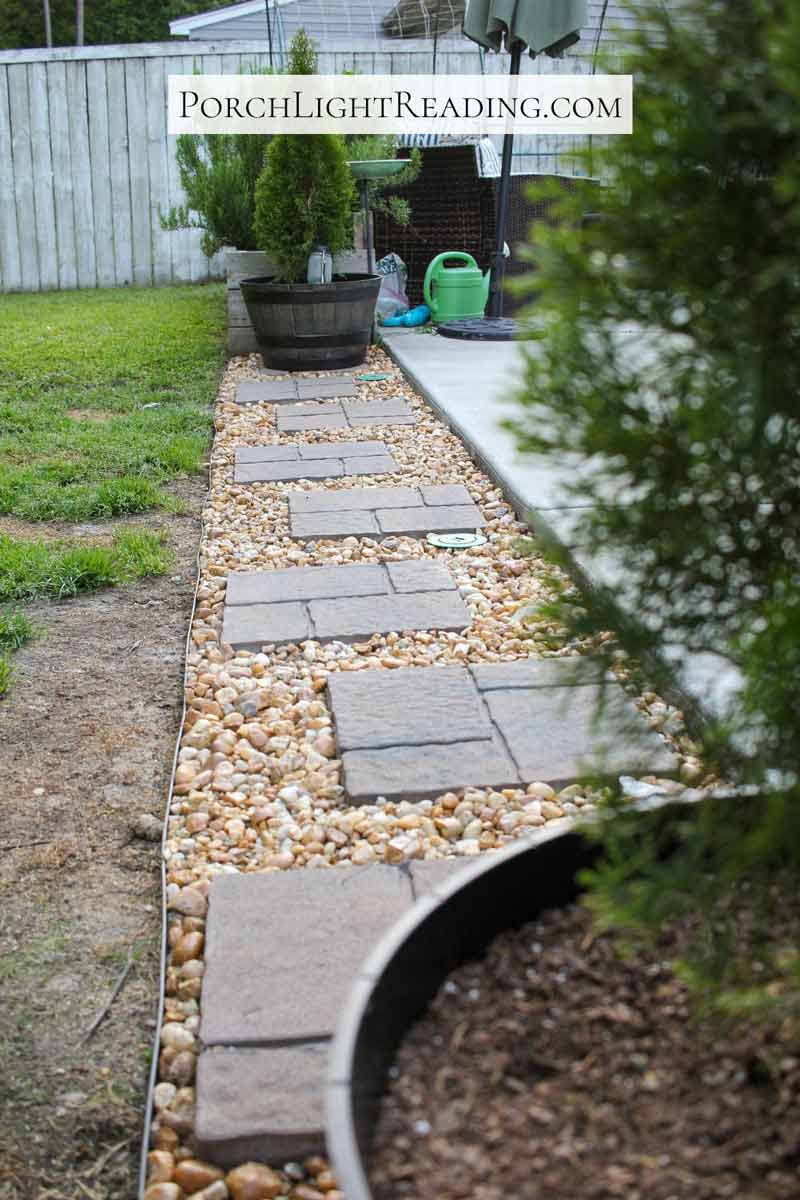
Mulch vs Rock Landscaping
There was a debate in this house for a hot minute about mulch vs rock for our patio extension. My husband wanted large rock while I wanted either smaller rocks or mulch.
We each had a specific look in mind and changing our minds later would be expensive and time consuming to switch over.
- Mulch vs Rock landscaping
- Mulch
- softer
- cheaper
- fade over time
- blow with leafblower
- Rock
- long lasting
- cleaner look
- scatter into the lawn/ needing to pick up before mowing
- Mulch
Related Posts:

Mulch would be a lot cheaper and easier to maintain over time. But some colors fade and don’t look very nice after a while and need a refresh.
It can also be glued in place so little feet don’t sweep it around or you don’t blow it with the leaf blower when cleaning the patio.
Rock would look nicer and be longer lasting. It would be easier to clean off the patio with rocks but if any rocks made it into the grass, they could be picked up with the lawnmower and thrown around.
Now these rocks come in three different sizes. River rock, pond pebbles, and pea gravel. River rock is the largest and would have been harder to grove into place and more unstable while our dogs walked over the top. Pea gravel is incredibly small and would be a pain to try and pick out of the grass when inevitably a few spilled over.
In the end we chose pond pebbles and glued them in place for a better hold.
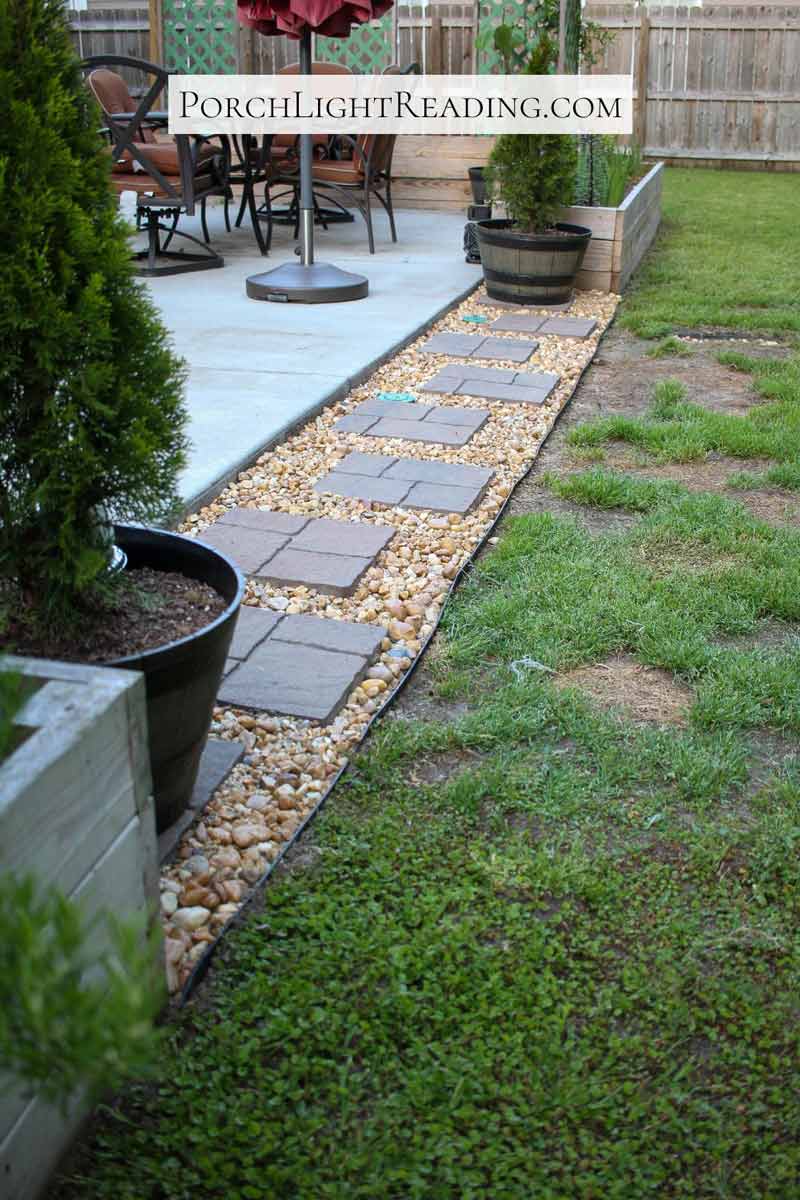
Landscape Fabric vs Paver Base Foam Panels
Landscape fabric helps prevent weeds and is easy to manipulate into the area you need. It comes in a roll so that you can cut exactly the size you need and save the rest for another project. Although our personal experience is that eventually weeds get through.
Paver base foam boards are thicker and gives a nice cushion base to the pavers. They have holes for easy drainage and are a great weed blocker. But they come in 4×2 foot boards which might not fit in all areas or may need some adjusting.
What We Chose
We originally purchased foam mats with the drainage holes and I was so excited for the purchase! However, after getting them in place we realized that since they were about half an inch thick, they made the area too tall once we placed the pavers on top.
In the end we returned the product and decided to take our chances with using nothing at all.
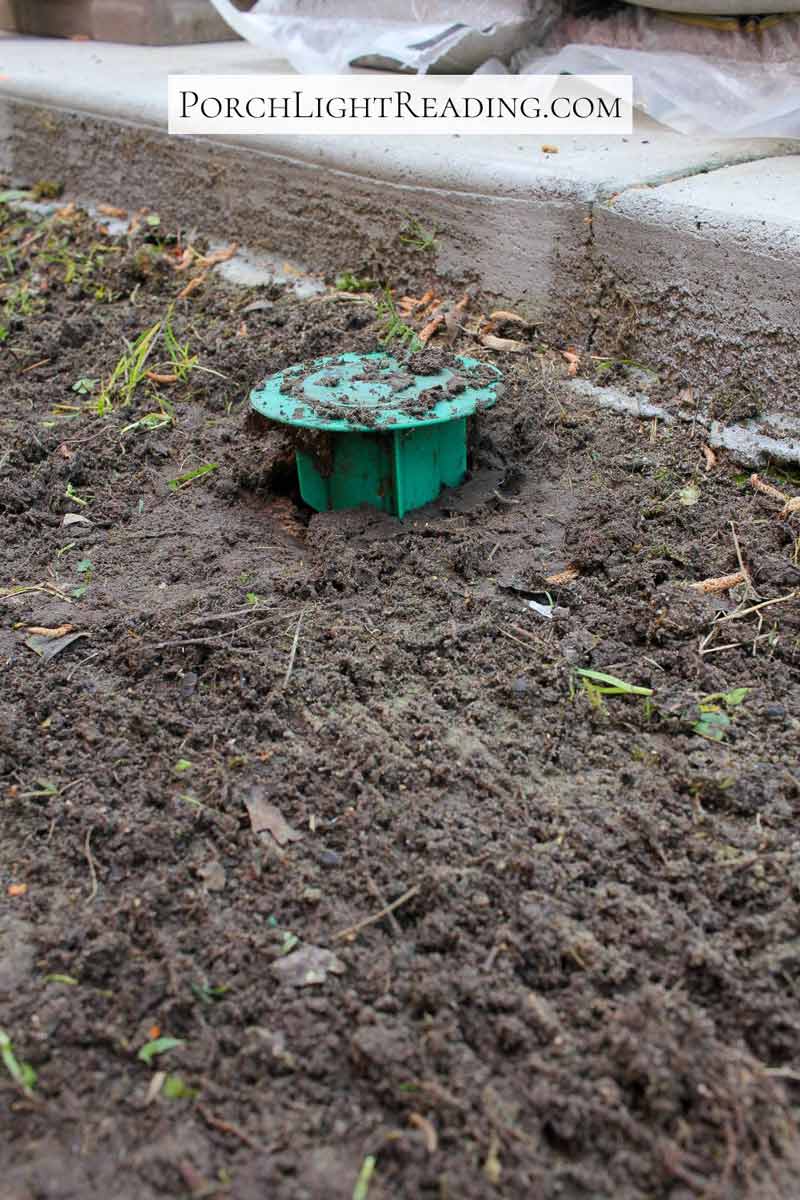
Termite Bait Traps
Around our concrete slab we have a few termite bait traps. Since they belong to a company who treats our yard, we’re not allow to move or block them.
While doing this project we had to be carful and take care while working around the traps.
First we giggled them a little bit and found that they would easily slide up to be level with our new extension. Carefully we worked around each one so that they are still easily accessible.
I would suggest calling your pest profession that maintains them to ask how they would like you to proceed before getting too far into the DIY project.
Frequently Asked Questions
The short answer is not always. For a simple patio extension gravel isn’t always necessary if it’s a small area that’s fairly level. Gravel becomes more important when the ground is very soft or uneven, you’re building a large patio, or need extra drainage.
Yes, for beginner projects it’s often the easiest option. Just make sure to level the sand well, lightly compact it, and check each paver as you place it.
Not necessarily. Traditional landscape fabric helps to reduce weeds and separates the soil from your base. But it can shift over time and not drain as well as expected. Perforated foam boards help with drainage and provide a more stable base.
Yes. Boarder trim helps keep pavers from shifting and holds the sand in place. It also give it a more finished look. It’s a small detail that really improves how everything holds up over time.
Both work, but it depends on what you’re looking for. Mulch is softer and more budget friendly, while rocks last longer and need less maintenance over time.
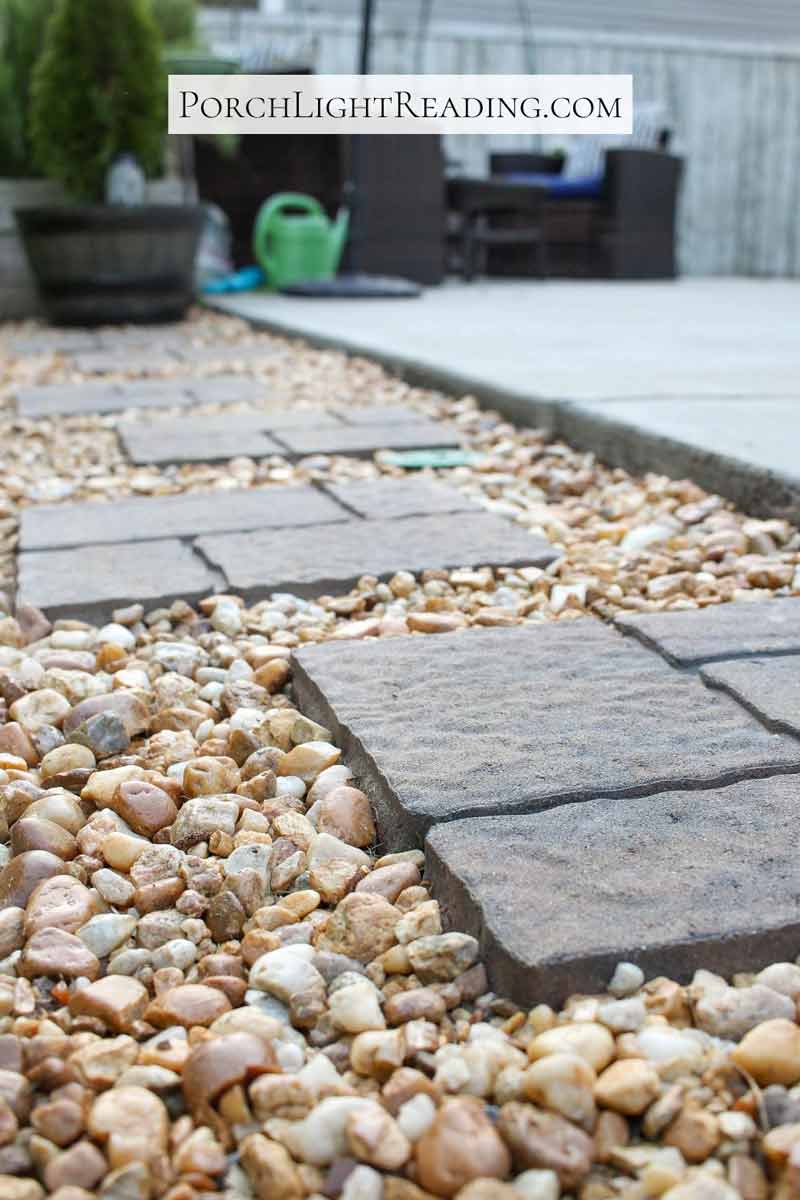
High Performance Mulch Glue For Rocks
I was a little worried that the mulch glue we purchased wouldn’t work for our size rocks. Some of our pond pebbles are larger than others and I couldn’t see how they could possibly stick together with the uneven spacing around them.
High performance mulch glue (Amazon)
Lawn and garden pump sprayer (Amazon)
Before we glued the rocks in place we packed them down by walking on them, moving them around and finding better spots for the larger stones. Once we got them packed down and situated, we glued them before we went in for the evening. Allowing them to dry completely over night.
The next morning I was pleasantly surprised to see it actually worked! Even with pond pebbles. It continued to dry even harder the following day and seem to be pretty strong.
Although we try and use the pavers instead of stepping on the rocks, the dogs and kids do knock the rocks and so far they have stayed in place and exceeded my expectations. Eventually we might have to glue them again but for this small project we have plenty of glue left over. Bonus- After the glue dries the rocks keep a shiny, rich color, as opposed to dull and dusty.
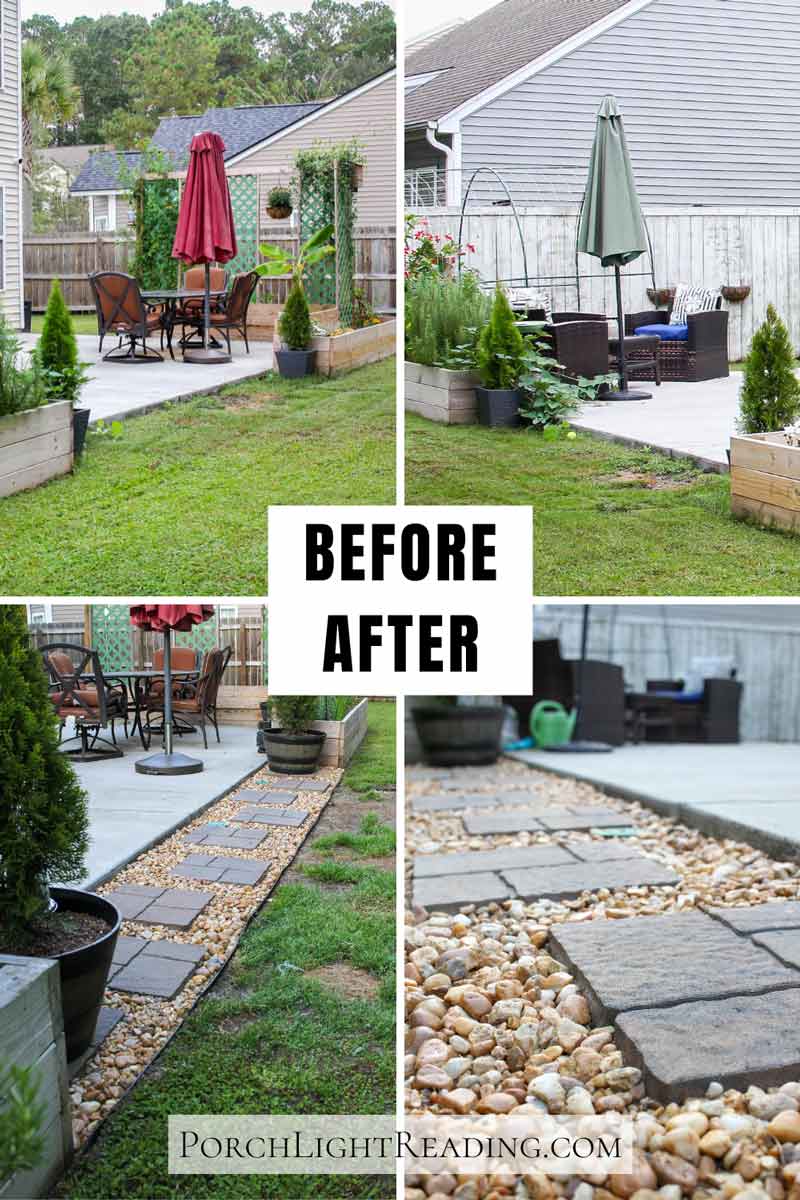
- Things we would have done differently
- Used better edging and more stakes to secure it.
- Took our time to find a rock color that matched the concrete better.
- Since the mulch glue works so well, we would have used the pea gravel instead of pond pebbles.
This easy DIY patio extension with pavers turned out to be exactly what we needed to keep the mud at bay. It’s beginner-friendly and makes a huge difference without the huge project, all while sticking to the budget. It’s not perfect and we learned a few things along the way, but that’s exactly what these project should teach us. Making us better homeowners for future home projects and maintenance. We’ll see you on our next family project as we turn this house into a cozy home.
You also might like…

Back to Home and Garden
Back to Home Page
Like this DIY patio extension with pavers idea? Save this post to Pinterest for later by clicking the Pin below!